When it comes to deploying lambda function into AWS, I have been using mostly Java for the implementation language and runtime. However, using Python has some advantages, especially if the code does not require parallel threads. E.g., the deployment package is usually a lot smaller and waking the lambda function, after it hasn’t been used for a while seems faster.
My preferred build automation system for Java-based projects is gradle and I found the com.github.kaklakariada.aws-sam-deploy plugin to be the most convenient way, to quickly build and deploy a stack. Basically a one-click thing, once the credentials are stored in ~/.aws/credentials and the project has a proper template.yaml file.
Even longer than gradle, IntelliJ Idea is me preferred IDE for all things Java, and while JetBrains offers a plugin to use IntelliJ for python development, I find their dedicated IDE for Python, aka PyCharm easier to use.
What follows are the steps to use PyCharm and Amazon’s Command-line -tools or alternatively JetBrains’ AWS ToolKit to create an environment for convenient deployment into AWS.
- Creating an AWS Account
- Installing AWS CLI and AWS SAM CLI
- Deploying into AWS
- Deploying with command tools – or –
- Deploying with JetBrains’ AWS Toolkit
1 Creating an AWS Account
AWS Accounts (aka Root User Accounts) can be created here:
https://portal.aws.amazon.com/gp/aws/developer/registration/index.html students should start here instead: https://aws.amazon.com/education/awseducate/
A credit card number and working phone is needed during the setup process. Select “Basic” for the support plan.
1.1 Creating an IAM Account
I then created an IAM Account (aka AWS Identity and Access Management (IAM) user) here:
https://console.aws.amazon.com/iam
1.2 Group
Now I select ‘Group’ on the left side and then click the “Create new Group” button.
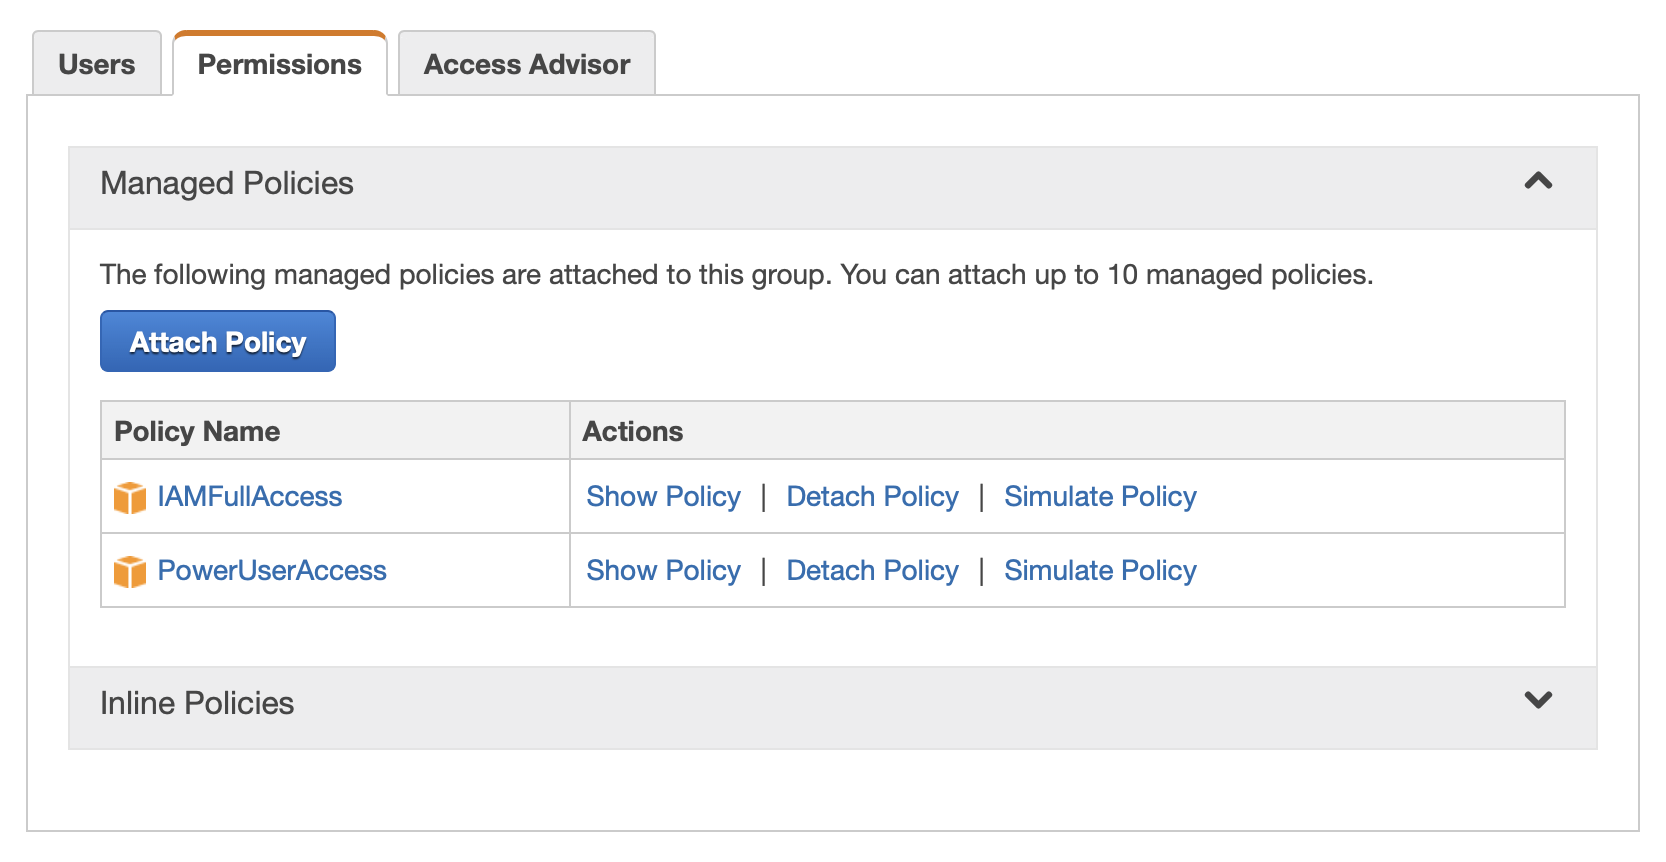
Enter a name (e.g. MyEduGroup) and in the next step add these two policies. As I found out just recently, policies for a specific Lambda function can be referenced in its template.yml file, which I will come back to at the end of this post. It’s still good to know right now that policies can be attached to a function instead of attaching it to a group or a user.
- IAMFullAccess
- PowerUserAccess
Review and click the “Create Group” button.
1.3 User
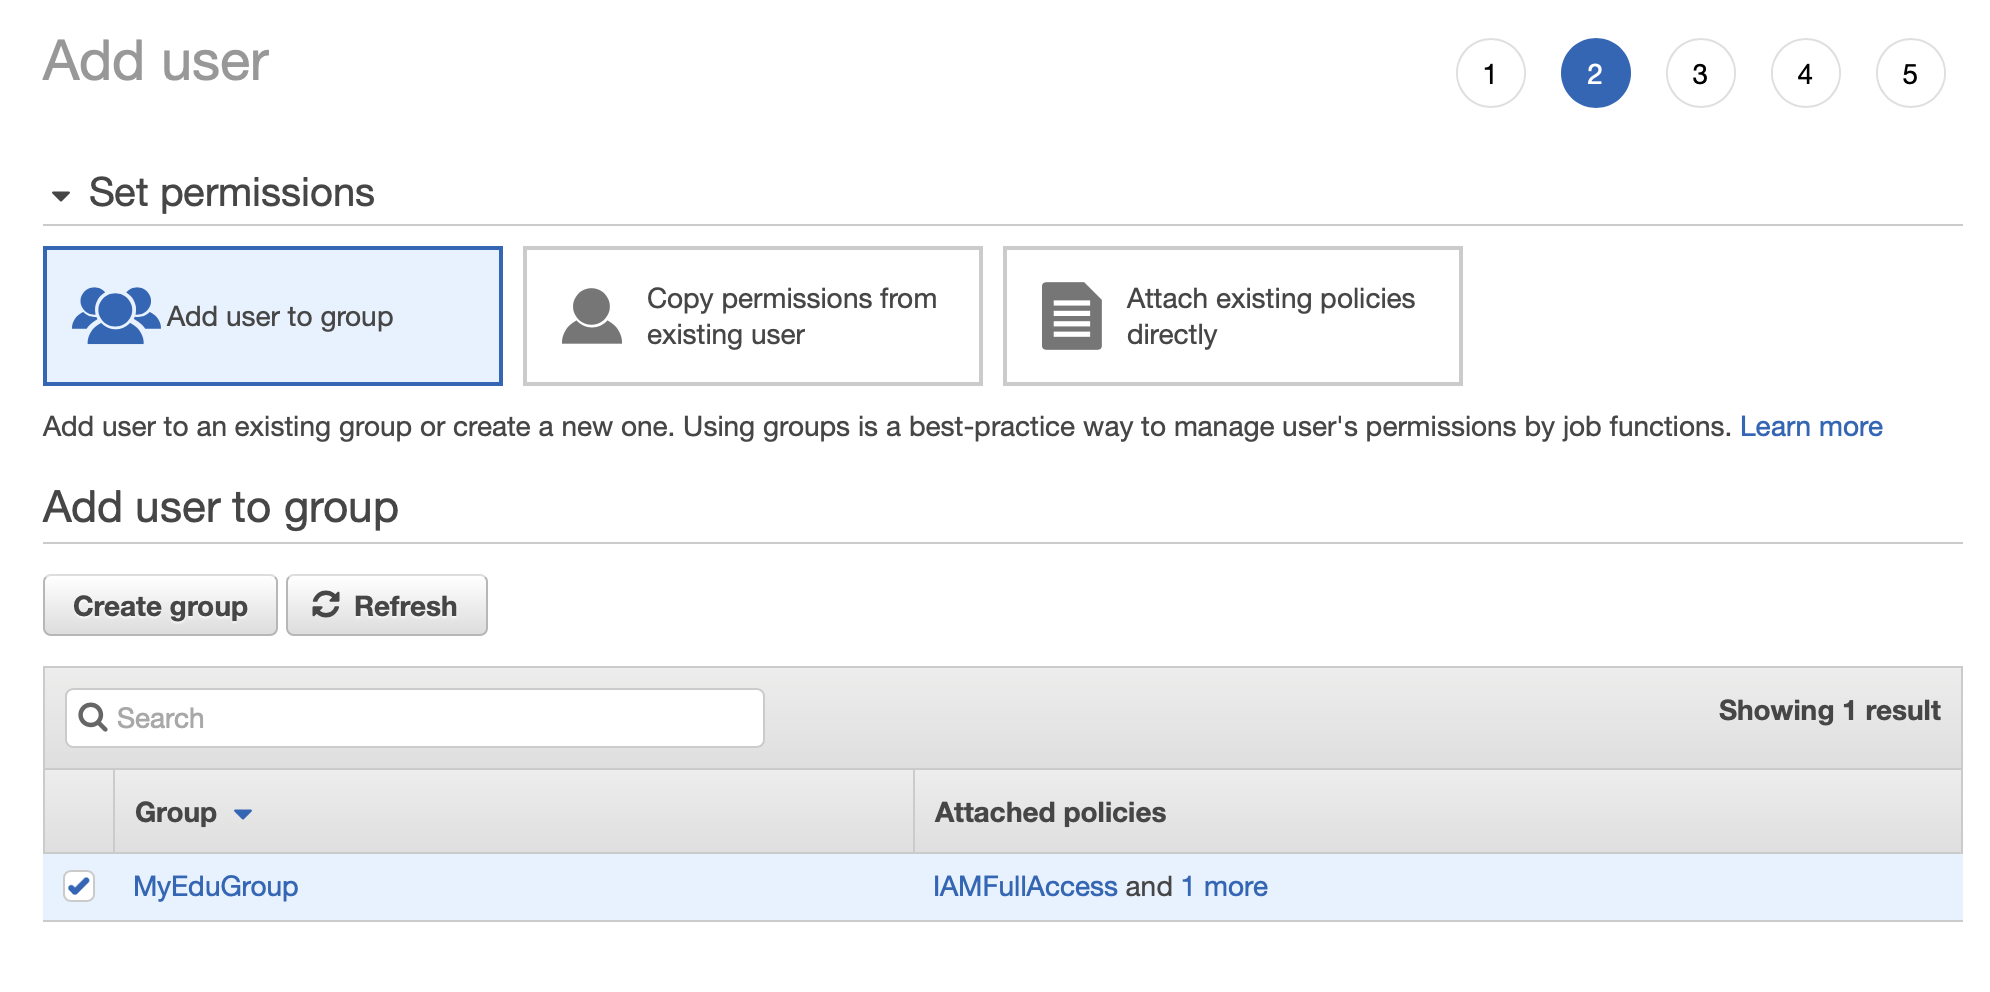
Select ‘User’ on the left side and then click the “Add user” button, to create a new IAM user.
Create a user name (e.g. MyEduUser) and select “Programmatic access” only.
Next, add the user to the group, mentioned above, (e.g. MyEduGroup)
Review and click the “Create user” button and don’t forget to download the csv file, containing the credentials. Add those credentials into a (hidden) file: ~/.aws/credentials file, which should then look like so:
[edu]
aws_access_key_id = AKI...
aws_secret_access_key = A+zgQz...
Btw, the string inside the square brackets is called the profile name
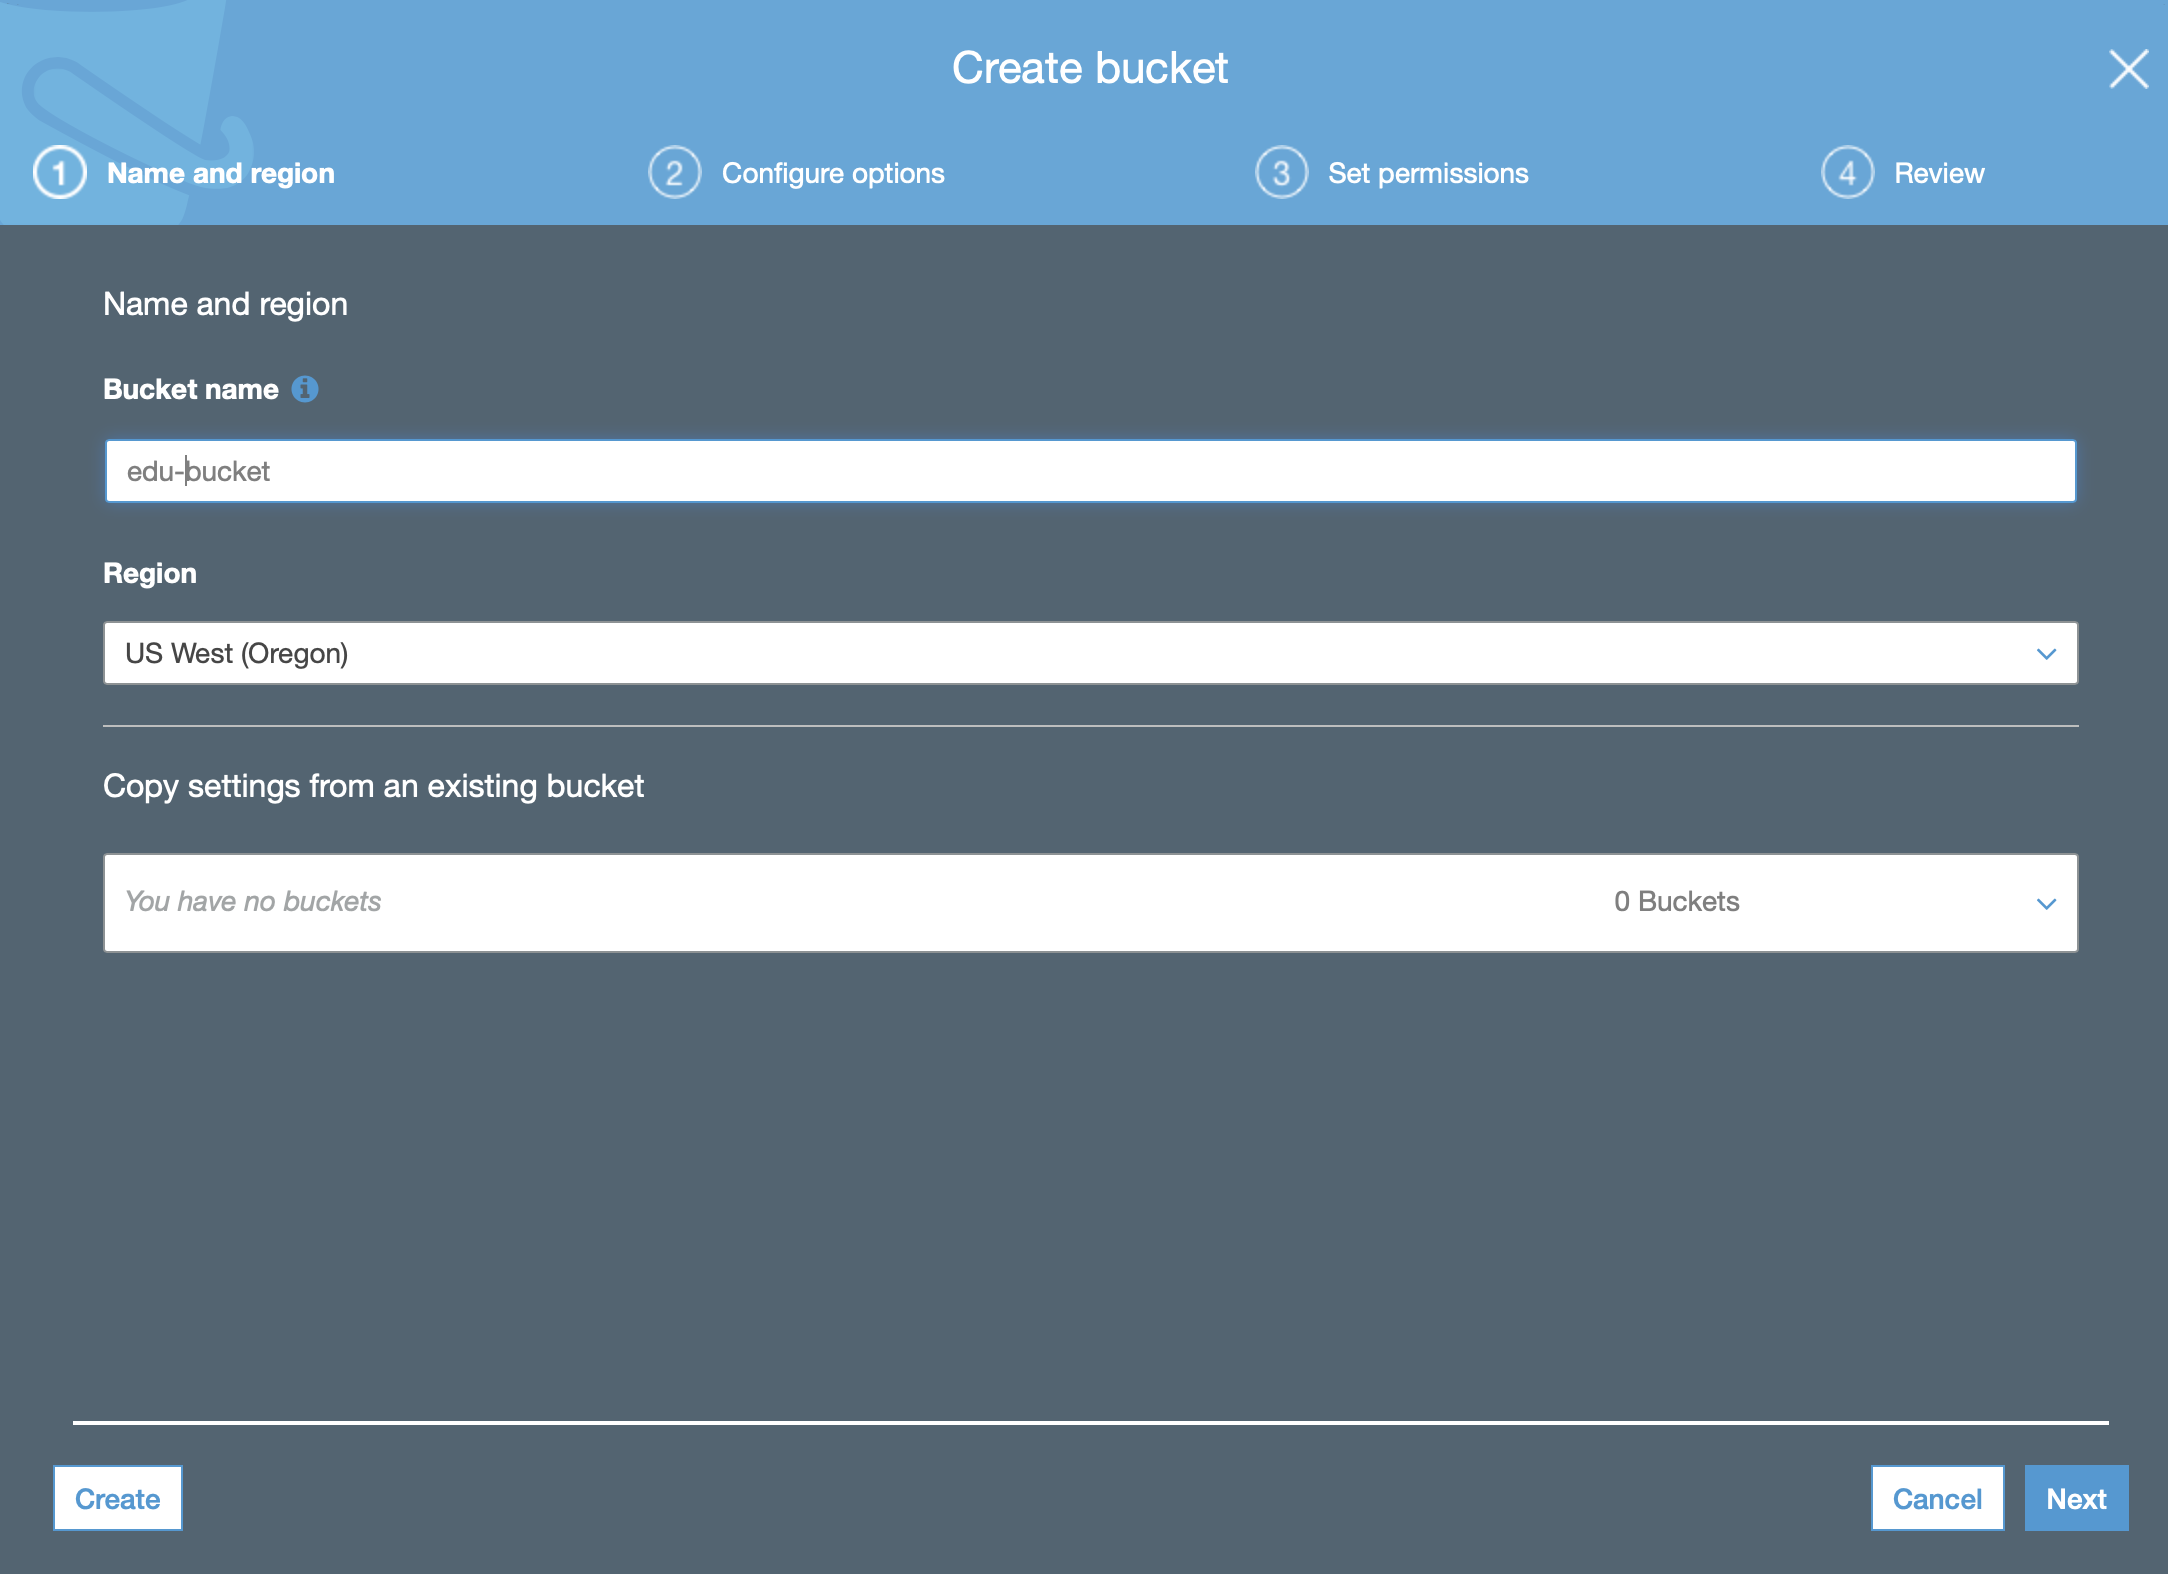
1.4 Bucket
While in the AWS web interface, click in Services and navigate/find S3. There you will have the chance to create a bucket. Do that. I used ‘edu-bucket’ and clicked through, going with all the defaults.
2. Installing AWS CLI and AWS SAM CLI
Jetbrains’ AWS Toolkit is basically just a UI accessing the AWS Command-line Tools, which therefore must be installed before we can use the Toolkit.
2.1 AWS CLI
How to install the AWS CLI version 2 is explained here. However, with Homebrew installed on your Mac, it can be installed like so:
brew install awscli
and confirming the installation like so:
aws --version
aws-cli/2.0.8 Python/3.8.2 Darwin/19.4.0 botocore/2.0.0dev12
2.2 AWS SAM CLI
How to install the AWS SAM CLI is explained here. Again, with Homebrew installed on your Mac, it can be installed like so:
brew tap aws/tap
brew install aws-sam-cli
and confirming the installation like so:
sam --version
SAM CLI, version 0.47.0
3 Deploying into AWS
3.1 Deploying with Command-line Tools
Still using the command line, I create a new folder and excuse ‘sam init’:
mkdir ~/PycharmProjects/AWSLambda
cd  ~/PycharmProjects/AWSLambda
sam init
which starts collecting some information, before proceeding:
I chose (1) for AWS Quick Start Templates
python3.7 for the runtime
entered hello for a project name
and (1) Hello World Example for the quick start application template
All that led to the following output:
-----------------------
Generating application:
-----------------------
Name: hello
Runtime: python3.7
Dependency Manager: pip
Application Template: hello-world
Output Directory: .
Next steps can be found in the README file at ./hello/README.md
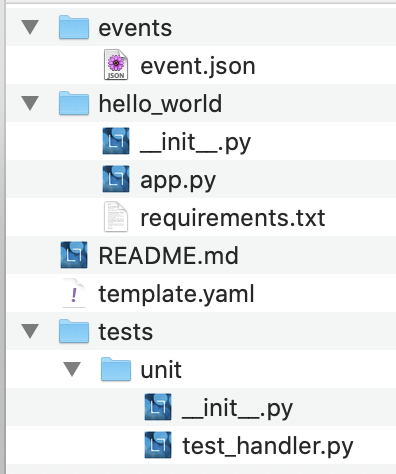
The sam init command initializes a serverless application with a SAM template and some boilerplate code. Here is what the folder/file structure looks like.
With the AWS credentials stored in the ~/.aws/credentials file and the previously created s-3 bucket, the following deploy script can be used to create an AWS CloudFormation stack and deploy the lambda function.
#!/bin/zsh

PROFILE="edu"
REGION="us-west-2"
BUCKET="edu-bucket"
STACK="Edu-Stack"

# build

sam build

# deploy

sam deploy\
 --capabilities="CAPABILITY_IAM"\
 --s3-bucket $BUCKET\
 --region $REGION\
 --profile $PROFILE\
 --stack-name $STACK

# delete the stack with this command:
# aws cloudformation delete-stack --stack-name $STACK --region $REGION --profile $PROFILE
Creating and running the deploy script in the project folder will result in something like this:
Building resource 'HelloWorldFunction'
Running PythonPipBuilder:ResolveDependencies
Running PythonPipBuilder:CopySource
Build Succeeded
Built Artifacts  : .aws-sam/build
Built Template   : .aws-sam/build/template.yaml

Deploying with following values
===============================
Stack name                 : Edu-Stack
Region                     : us-west-2
Confirm changeset          : False
Deployment s3 bucket       : edu-bucket
Capabilities               : ["CAPABILITY_IAM"]
Parameter overrides        : {}

CloudFormation outputs from deployed stack
Outputs
Key                 HelloWorldFunctionIamRole
Description         Implicit IAM Role created for Hello World function
Value               arn:aws:iam::178522735890:role/Edu-Stack-HelloWorldFunctionRole-1F9K36EUWBDRL
Key                 HelloWorldApi
Description         API Gateway endpoint URL for Prod stage for Hello World function
Value               https://1lcw260mvj.execute-api.us-west-2.amazonaws.com/Prod/hello/
Key                 HelloWorldFunction
Description         Hello World Lambda Function ARN
Value               arn:aws:lambda:us-west-2:178522735890:function:Edu-Stack-HelloWorldFunction-1FWZM46M02QR3
Successfully created/updated stack - Edu-Stack in us-west-2
After finding the endpoint the the output above, a tool like httpie can be used to quickly run a request:
▶ http get https://pk2700q2a5.execute-api.us-west-2.amazonaws.com/Prod/hello/
HTTP/1.1 200 OK
Connection: keep-alive
Content-Length: 26
Content-Type: application/json
Date: Tue, 21 Apr 2020 20:22:31 GMT
Via: 1.1 02b9f097e6bccd6a8d89ebf056435cb5.cloudfront.net (CloudFront)
X-Amz-Cf-Id: FCvYo61XLpyhOTy-TKoYFM5kQj7dbggdrRCKrlX_PqMVy0kt2ppzzA==
X-Amz-Cf-Pop: LAX50-C2
X-Amzn-Trace-Id: Root=1-5e9f5607-ceb665183f353ae439380d0e;Sampled=0
X-Cache: Miss from cloudfront
x-amz-apigw-id: LWphKH53vHcFnvw=
x-amzn-RequestId: 42ccbde7-b8d6-4668-9d9f-0e7bb9e939d9
{
    "message": "hello world"
}
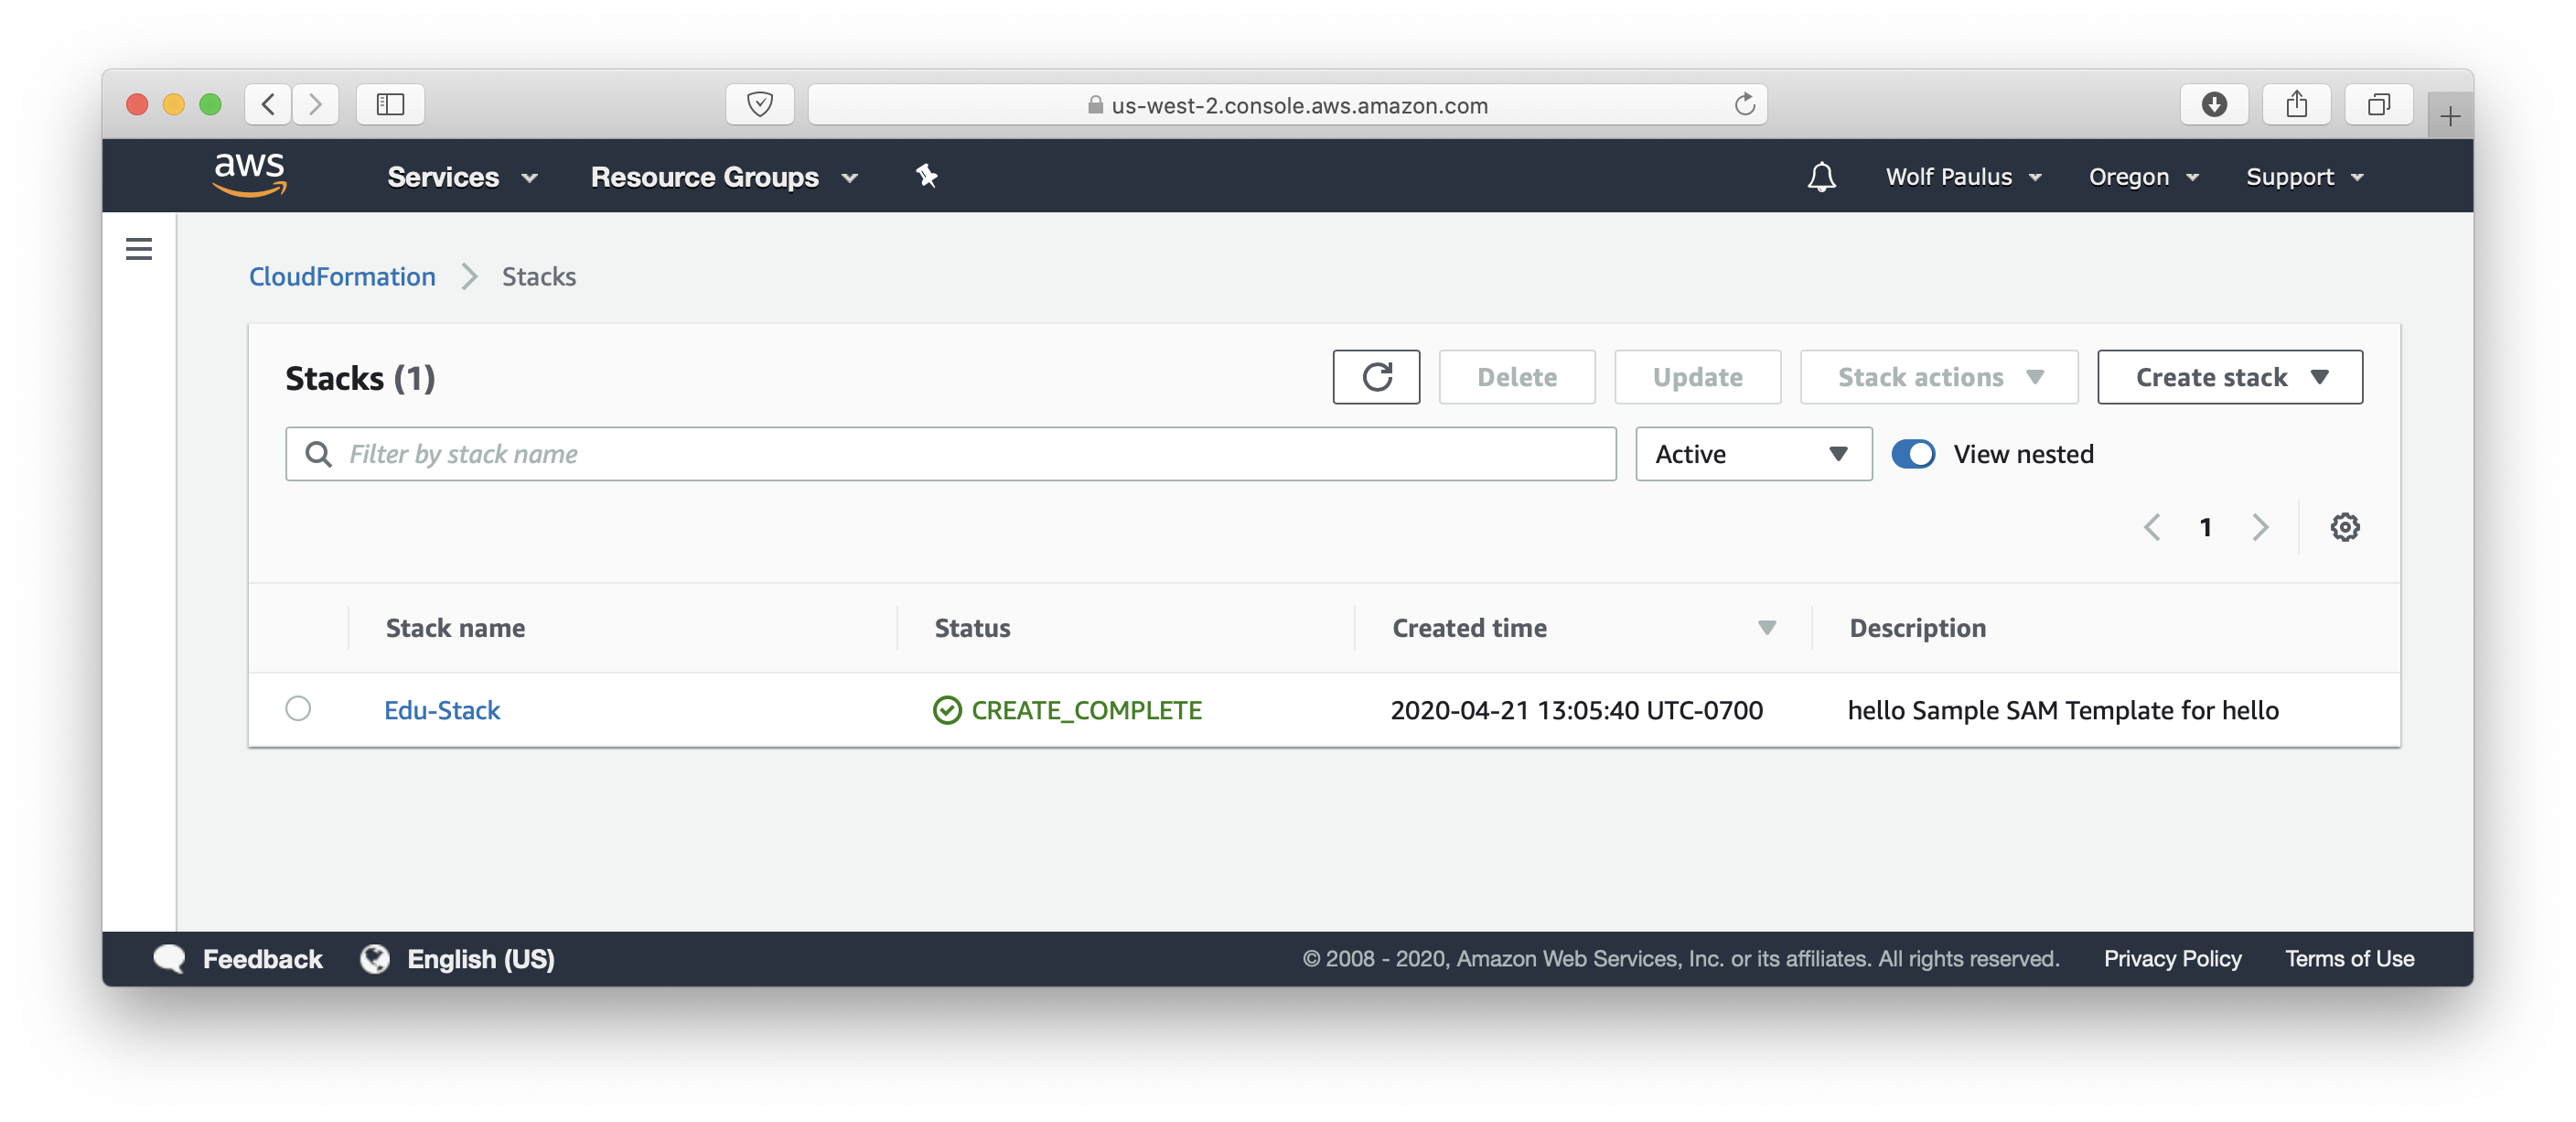
Of course the just created stack shows up in the AWS Web GUI as well:
Let’s delete the Stack and do the same with PyCharm and the AWS ToolKit installed.
3.2 Deploying with JetBrains’ AWS Toolkit
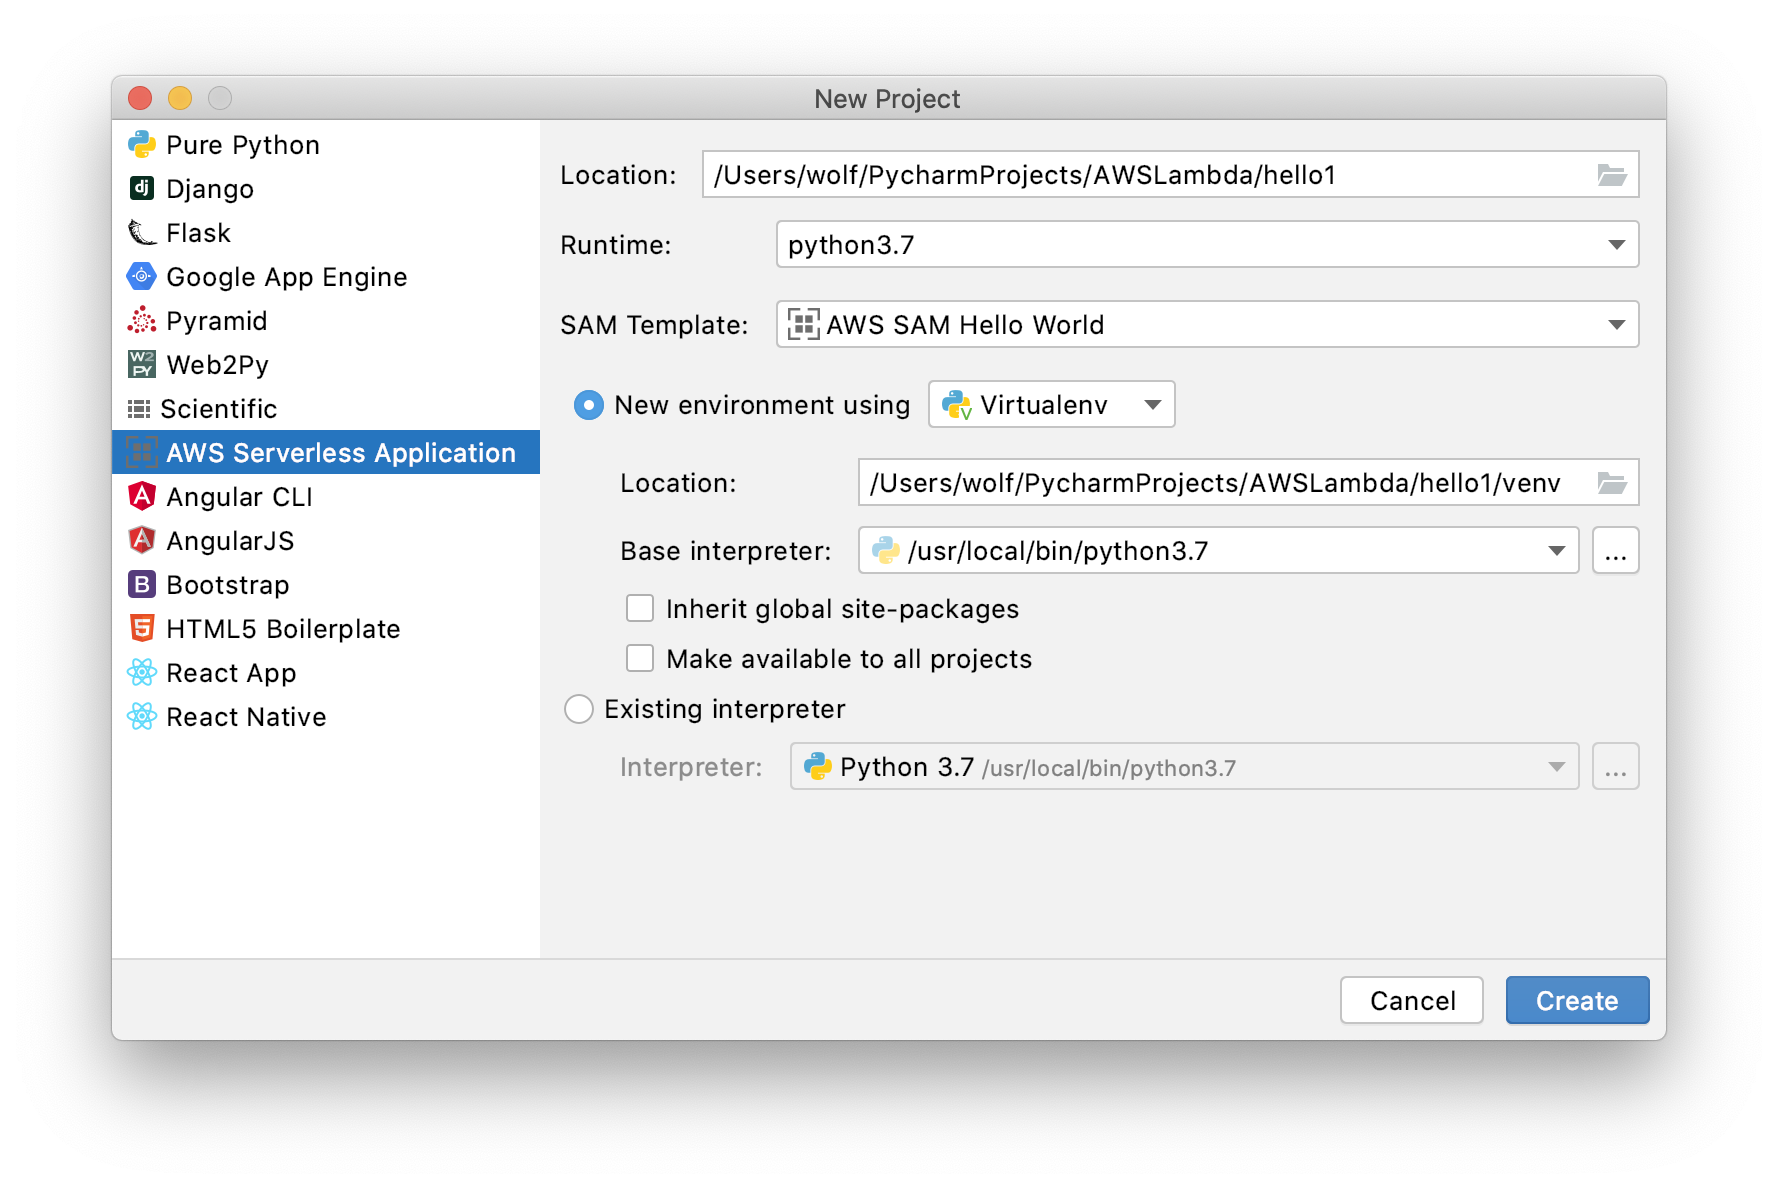
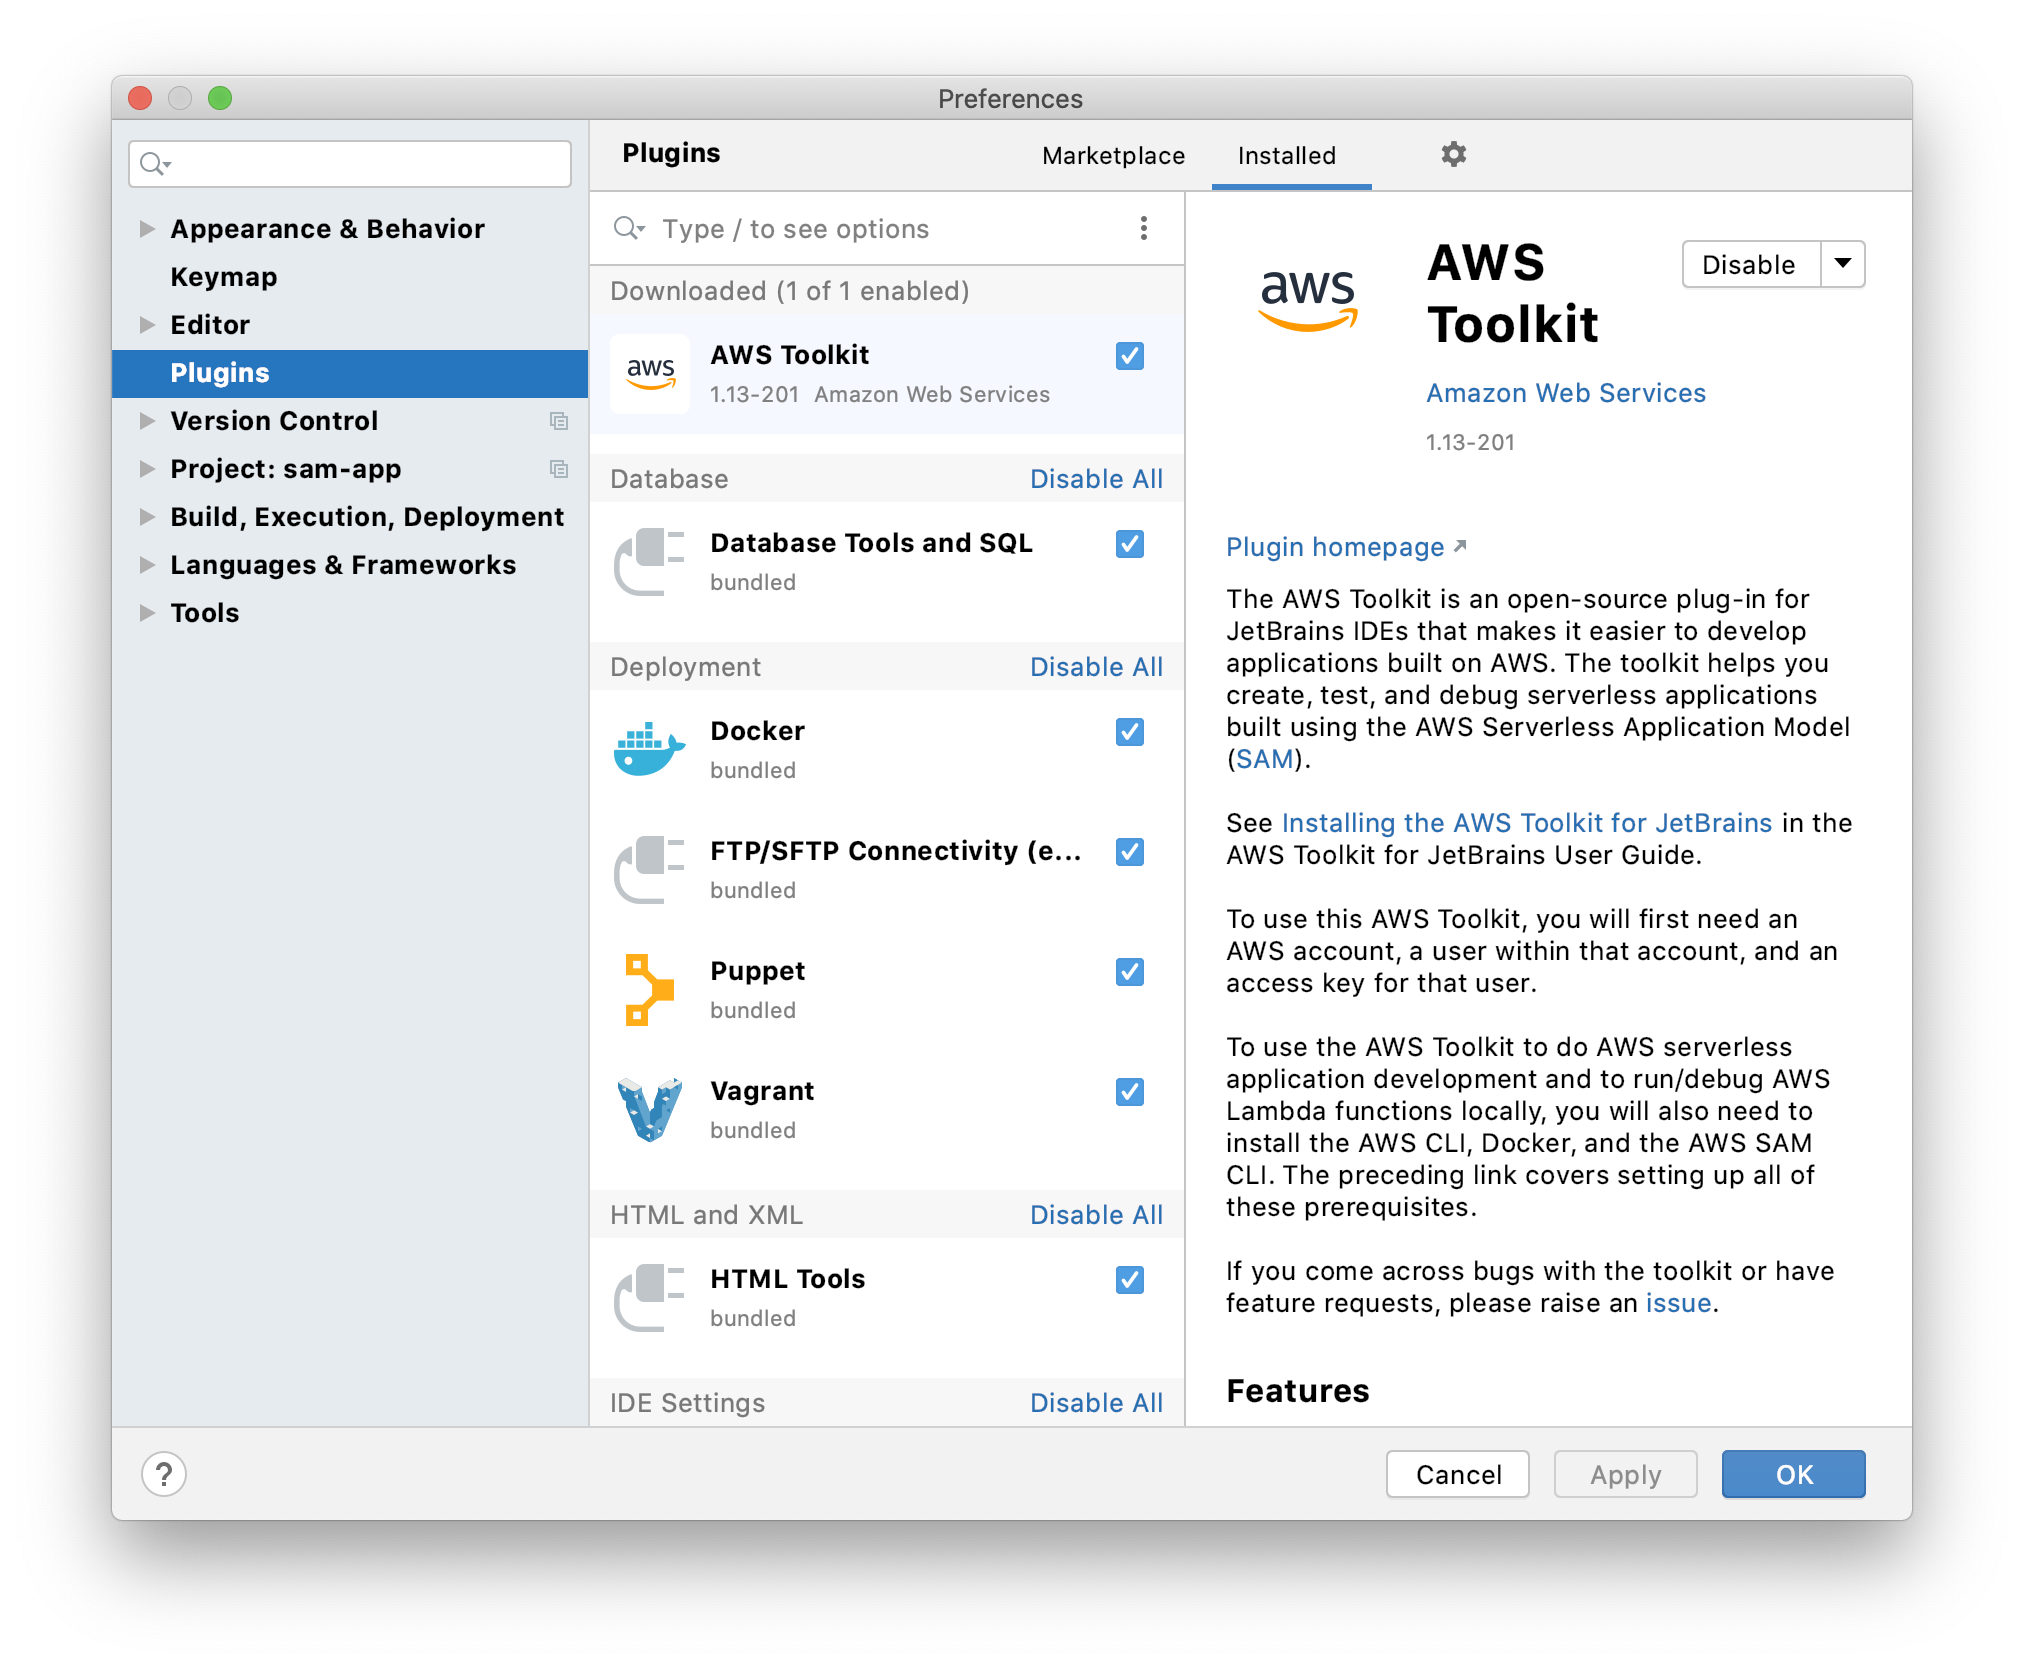 After launching PyCharm start with installing the AWS Toolkit plugin. Re-launch PyCharm and create a new project, selecting “AWS Serverless Application” application type. Just like before, I select python 3.7 and the “AWS SAM Hello World” SAM Template, and let PyCharm create the project structure.
At this point a dialog pops up asking me if I want to create a project from existing source?
Here I click [NO]
A now already familiar looking folder/file structure will appear. Open the ‘AWS Explorer’ Tab at the lower left side of the IDE. Click on Configure AWS connection and select your profile and region, after which at least the CloudWatch logs from before (we forgot to clean those up) will show up.

Here is the ToolKit’s User Guide.
Clicking the AWSExplorer tab followed by the options icon, allows to configure the AWS connection. I.e. the AWS Profile (e.g. ‘edu’) and Region (e.g. ‘us-west-2’) need to be set.
To quickly create the stack and deploy the lambda function, simply right-click the ‘template.yaml’ file and select ‘Deploy Serverless Application’. In the following dialog I provided a stack name, this time Edu-Stack1 and in the ‘CloudFormation’ tab at the very bottom of the IDE, the process of the deployment can be monitored.
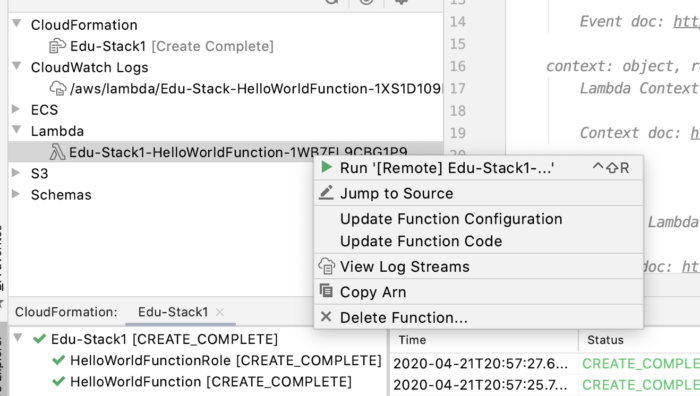
After refreshing the AWS Explorer tab, the Edu-Stack1 and the lambda function shows up as well. A right-click on the function followed by “Run” will allow you to invoke the function.
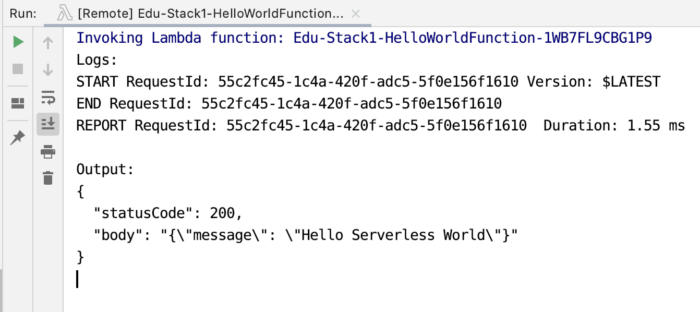
Let’s open app.py, the python script that contains the actual lambda function, and make a code change. E.g. change the message t0 “Hello Serverless World”. Now, right-click the ‘template.yaml’ file and select ‘Deploy Serverless Application’ again. This time Update Stack is pre-selected and clicking Deploy succeeds a little quicker than before.
A right-click on the function followed by “Run” will show the returned response, of the updated lambda function.