Virtual Private Network
Being born and raised in Germany, most of my extended family lives over there and even after all these years, a simple phone call easily reconnects me with family and friends. Almost like a secret handshake, dialing a number and hearing each others voice makes me part of their networkover there.
With a little bit of work, the same can be had for your computer. Even if you travel, being away from home for an extended period of time, your computer can still be made part of your home-network, with just a click of a button …
I cannot believe that it’s really that long ago, but back in March 2008, I wrote about how to Protect your online privacy when on the road by using your Home Router as a Secure Socket Proxy. This is still very relevant and works just like I had written then, but using an ssh tunnel falls short when you want to turn the remote machine into an equal member of your home network; for this we need a Virtual Private Network.

General
- Enter a name for your connection.
- Enter the IP address or preferably the name of your router (DynDns to the rescue, if you don’t have a static IP).
- Enter a valid port number, like 1195
- Select udp as the protocol
- Select tab as the interface type.
- Select the Enable DHCP option.
- Select the Enable DNS support option.
Certificates
- Select Static Key as the type.
- Navigate to the
static.keyfile, you created earlier. Viscosity will copy its content and keep it in ~/Library/Application Support/Viscosity/OpenVPN. - Select Default for direction.
Options
- Only have these options checked:
- Persist Tun
- Persist Key
- Use LZO Compression
- No Bind
Networking
- Check Send all traffic over VPN connection.
- Enter your router’s internal IP address, something like 192.168.1.1
- Leave everything else empty
Leave Proxy and Advanced settings empty and move along to the router side of things:
Router-Side
Installing TomatoVPN on your router works just like upgrading any router software and if you are already familiar with Tomato, the only difference you will notice is the newly added menu-item on the lefthand side: VPN Tunneling, which allows setting up the router as a VPN client and/or server. Obviously, we are more interested in the server part here, which has 4 tabs: Basic, Advanced, Keys, and Status.
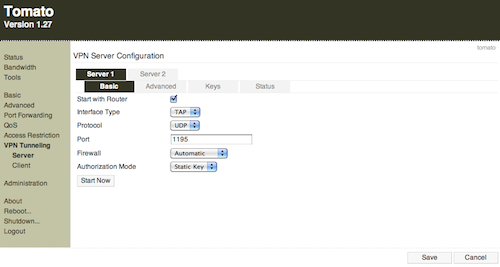
Basic
- Check the Start with Router option.
- Select TAB as the interface type.
- Select UDP as the protocol
- Enter a valid port number, like 1195 (same you were using when setting up the client software)
- Select Automatic as the firewall setting.
- Select Static Key as the authorization mode
- Save your configuration.
Advanced
- Select the Respond to DNS option.
- Select Use Default for encryption cipher.
- Select Adaptive for compression.
- Leave the custom configuration field empty.
- Save your configuration.
Keys
- Copy the content form the earlier create
static.keyfile into the Static Key field. - Save your configuration.
It’s finally time to hit the Start Now button.
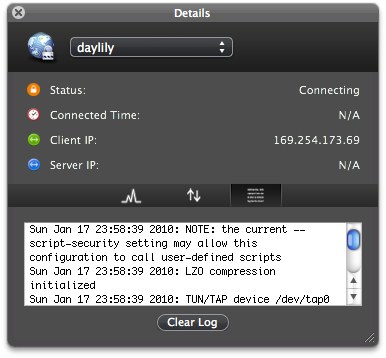
Now with the router listening for VPN requests on port 1195, everything is ready to go and the next time you’re away from home, start Viscosity and select Connect after clicking on the new icon that just appeared in your menu bar. Also, select Details.. to find out what’s going on. Select the log icon in the dialog window for debugging.