During my final years in high school, I became captivated by the world of computers, succumbing to the allure of programmable devices. The late-afternoon bus rides back to the city, followed by brisk 20-minute walks to the local university, often led me to an unlocked door, where I would sneak in, try to appear a bit older, and eventually secure time on an unattended terminal or even a Tektronix graphical workstation. While professors, somewhat lagging behind the technology curve, persisted in demanding punch cards for homework submissions, I seized the opportunity to explore the untapped potential of newer technologies 😉
Fast forward to today, and programmable devices have become not only ubiquitous but also affordable and easily accessible. Gone are the days of bus rides and shady university entries. Our classrooms at Embry Riddle are equipped with commendable PCs running Windows and/or Linux, complete with all the necessary pre-installed software. However, I entertain a suspicion that students who bring their own devices to class tend to outperform their counterparts and achieve higher grades.
While it’s true that most students do bring a computer to class, the array of devices encountered is vast, ranging from high-end gaming laptops and MacBooks to Chromebooks and aging iPads. It might be presumptive, but I believe that some students with seemingly inadequate devices may simply be constrained by financial limitations.
This brings me to a crucial inquiry: Is there a computer that strikes the delicate balance of nimbleness and affordability, catering to students who are truly on a budget?
In spring 2023, the Lenovo IdeaPad 1-15IJL7 Laptop 82LX0050US cost as little as $149, here are the hardware specifications:
- Display diagonal: 15.6, 1920 x 1080 pixels (not a touchscreen)
- Processor: Intel Pentium Silver N6000 1.1 GHz (Jasper Lake) .. CPU Benchmarks
- Internal memory: 4 GB DDR4-SDRAM 2933 MHz
- Storage: Toshiba 128 GB eMMC
- Wi-Fi 6 (802.11ax)
- Ports: USB-A 3.2, USB-A 2.0, USB-C (data transfer only, not for charging), Headphone, HDMI, SDCard Reader
- WebCam resolution: 1280 x 720 pixels, two microphones
- Full-size Keyboard (incl num pad but is not backlit)
- Battery: 11 hrs
- Weight: 1.45 kg
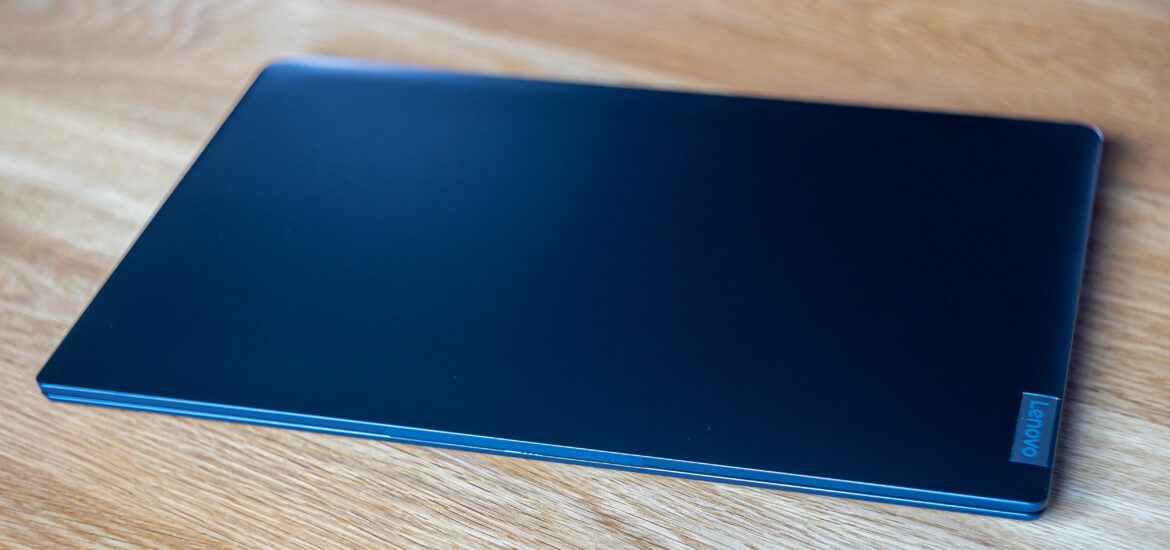
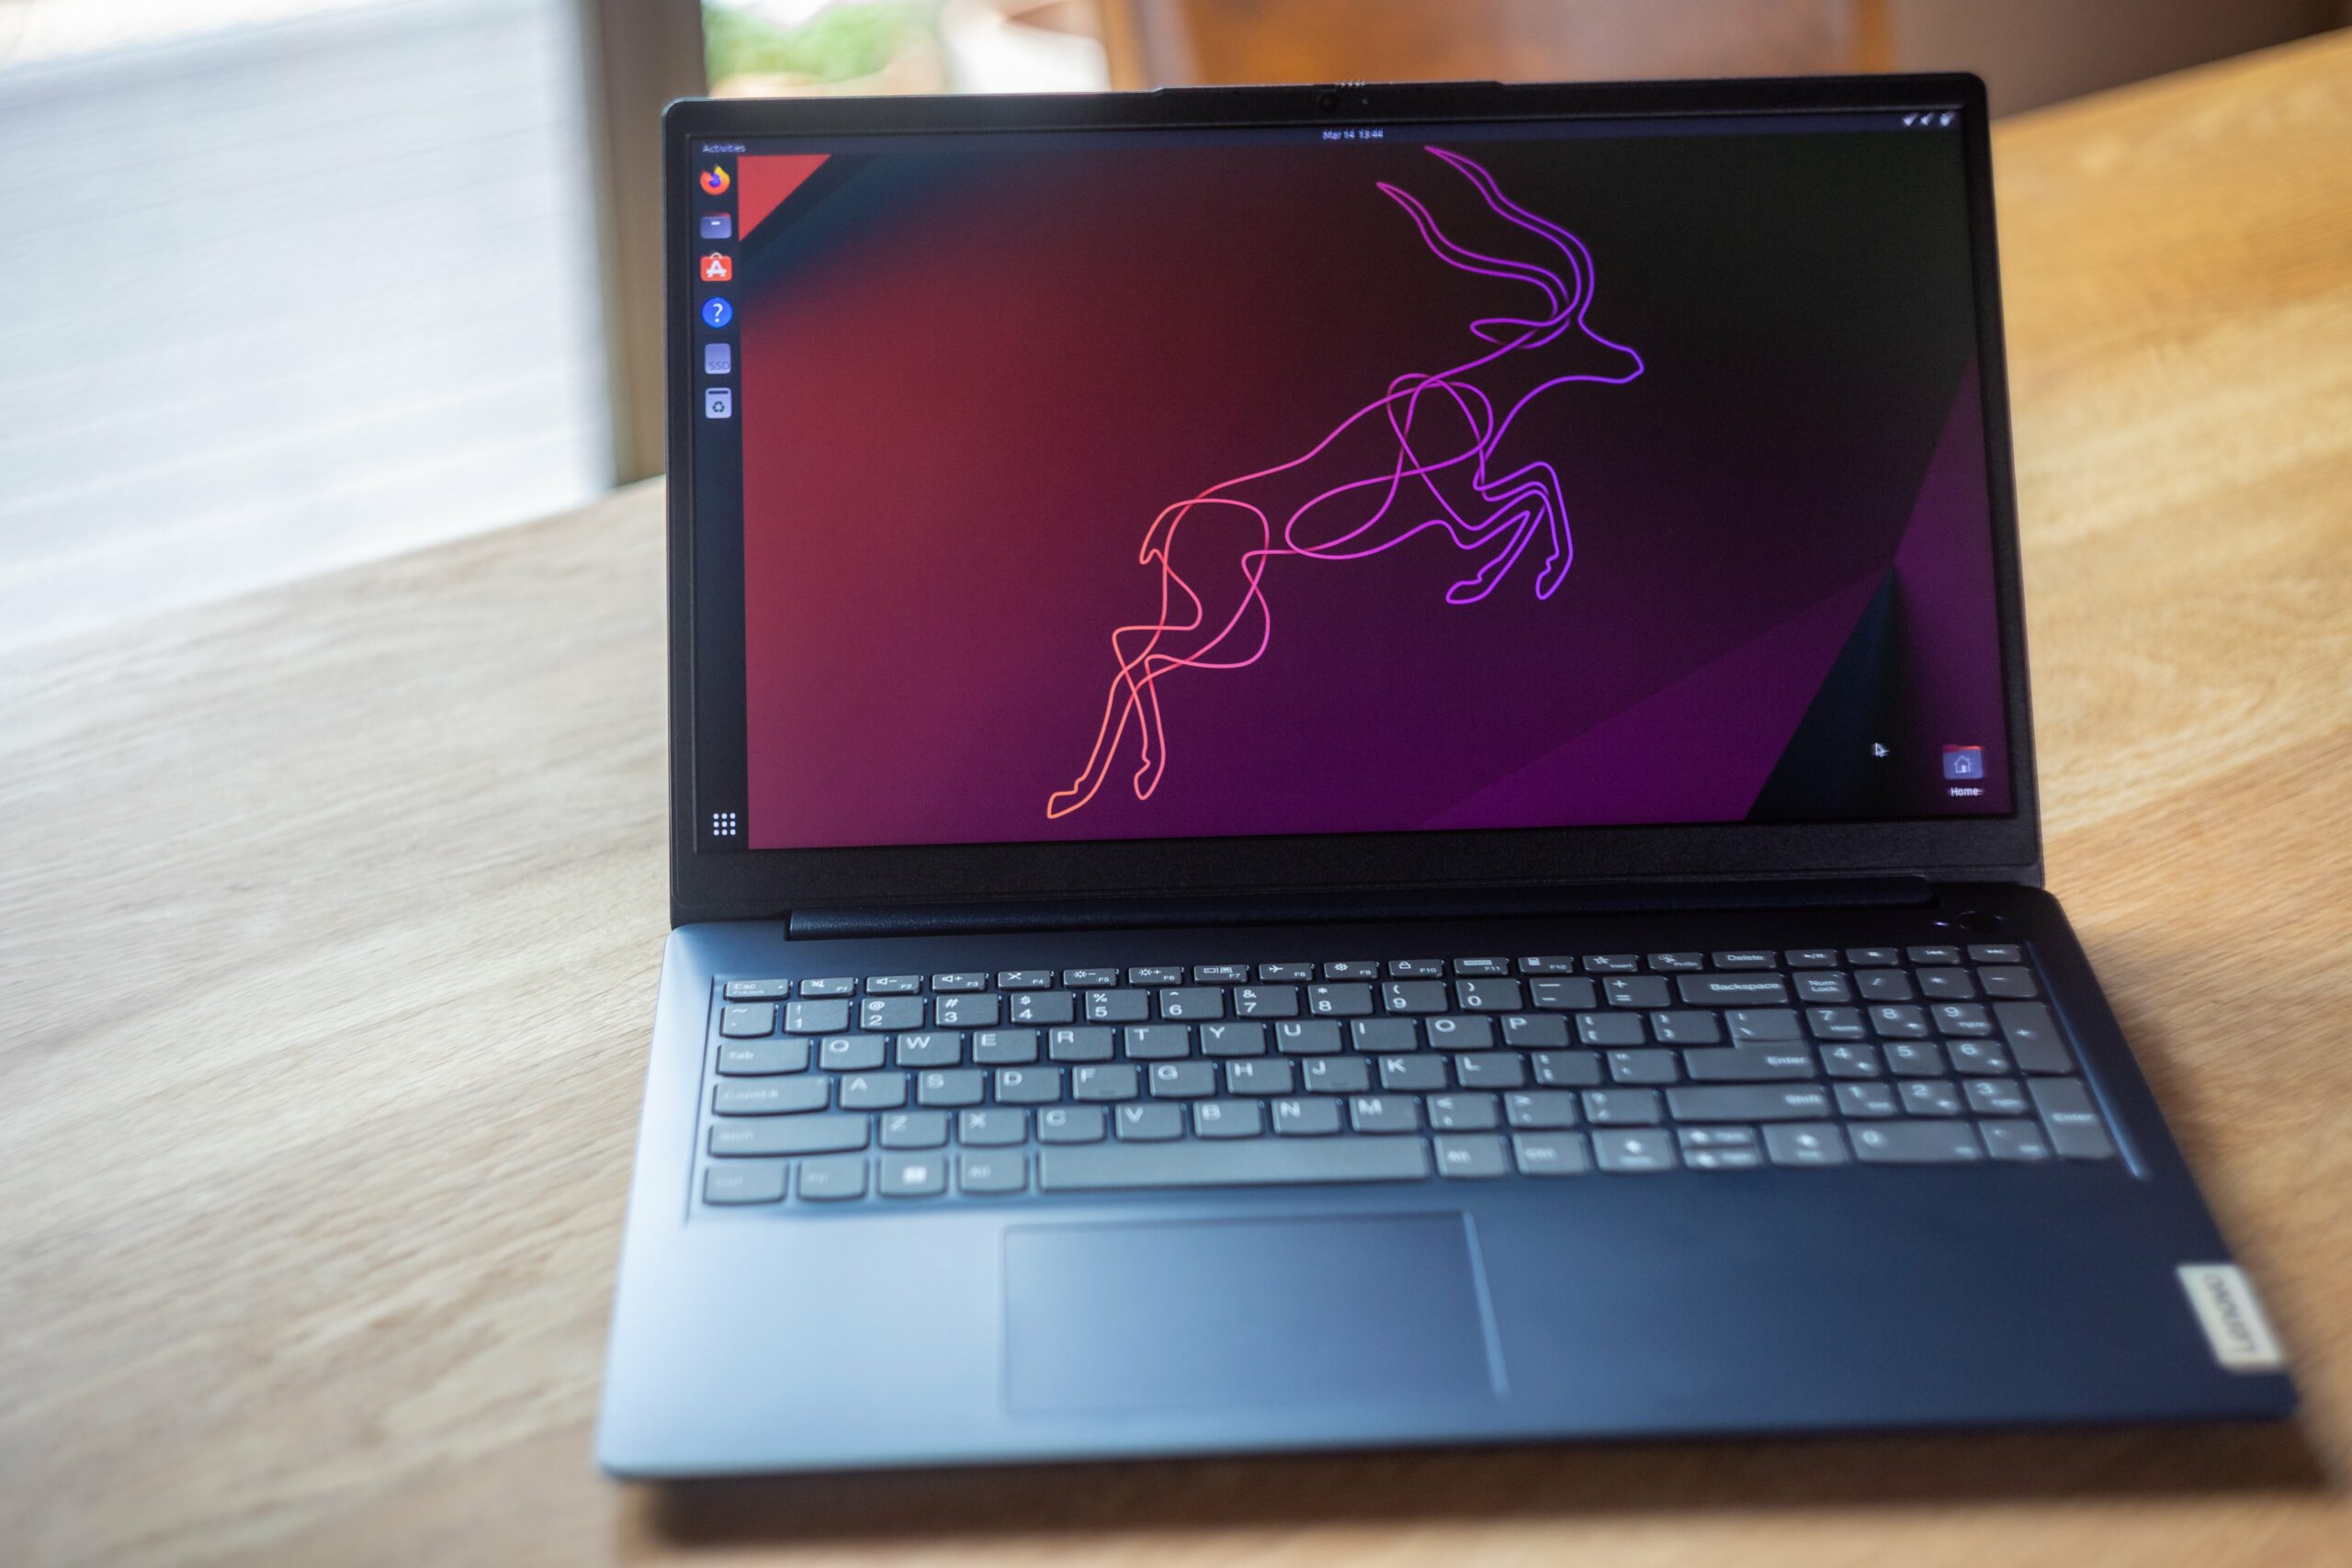
Discussing the specifications of this budget laptop, they appear surprisingly commendable. It’s important to note, however, that despite bearing the Lenovo brand, the overall feel is far from premium and tends towards the plasticky side. Yet, there’s a silver lining – once you strip away the plethora of stickers, the dark blue finish gives the device a rather pleasing aesthetic.
Straight out of the box, however, the laptop falls short for most tasks. Running on Windows 11 in S-Mode, the display lacks the desired contrast, the 4 GB internal memory proves inadequate for opening more than two or three browser tabs, and the major drawback lies in the sluggish and confined eMMC hard drive.
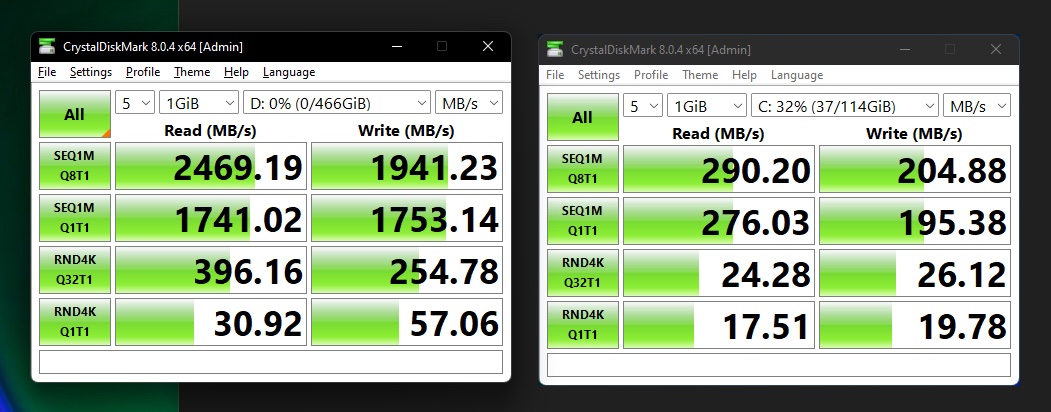
While there’s little that can be done to enhance the display beyond employing ‘dark mode’ for software, the memory issues can be effectively addressed. Investing in an 8 GB DDR4 RAM module ($19) and a swift 500GB Solid State Drive ($36) can work wonders.
Allow me to illustrate how this now $204 laptop transforms into a capable device.
Preparing for the Upgrade
While the laptop comes preinstalled with Windows 11, you may find it necessary to perform a clean installation of the operating system. Prior to this, it’s crucial to verify that the activated Windows 11 digital license is appropriately linked to your Microsoft account.
Navigate to the Activation page in Settings, ensuring that it reflects the status of the “copy activated with a digital license and associated with a Microsoft account.”
For the clean installation process, temporarily gather a few tools: a USB drive with a minimum of 8GB capacity, a USB mouse, a small Phillips-head screwdriver, and a guitar pick or putty knife. Borrowing these items from a friend is perfectly acceptable, as they will be needed only briefly.
To switch Windows 11 out of S mode, follow these steps.
To create a bootable USB drive to install Windows 11 from, follow the “Create Windows 11 Installation Media” instructions.

Hardware Upgrade
Before introducing additional memory modules, power off the computer, and then press Fn and the power button to access the “Novo Menu.” From there, open the BIOS menu and locate the option to “Disable Built-in Battery.” Ensure the power cord is unplugged before selecting this option.
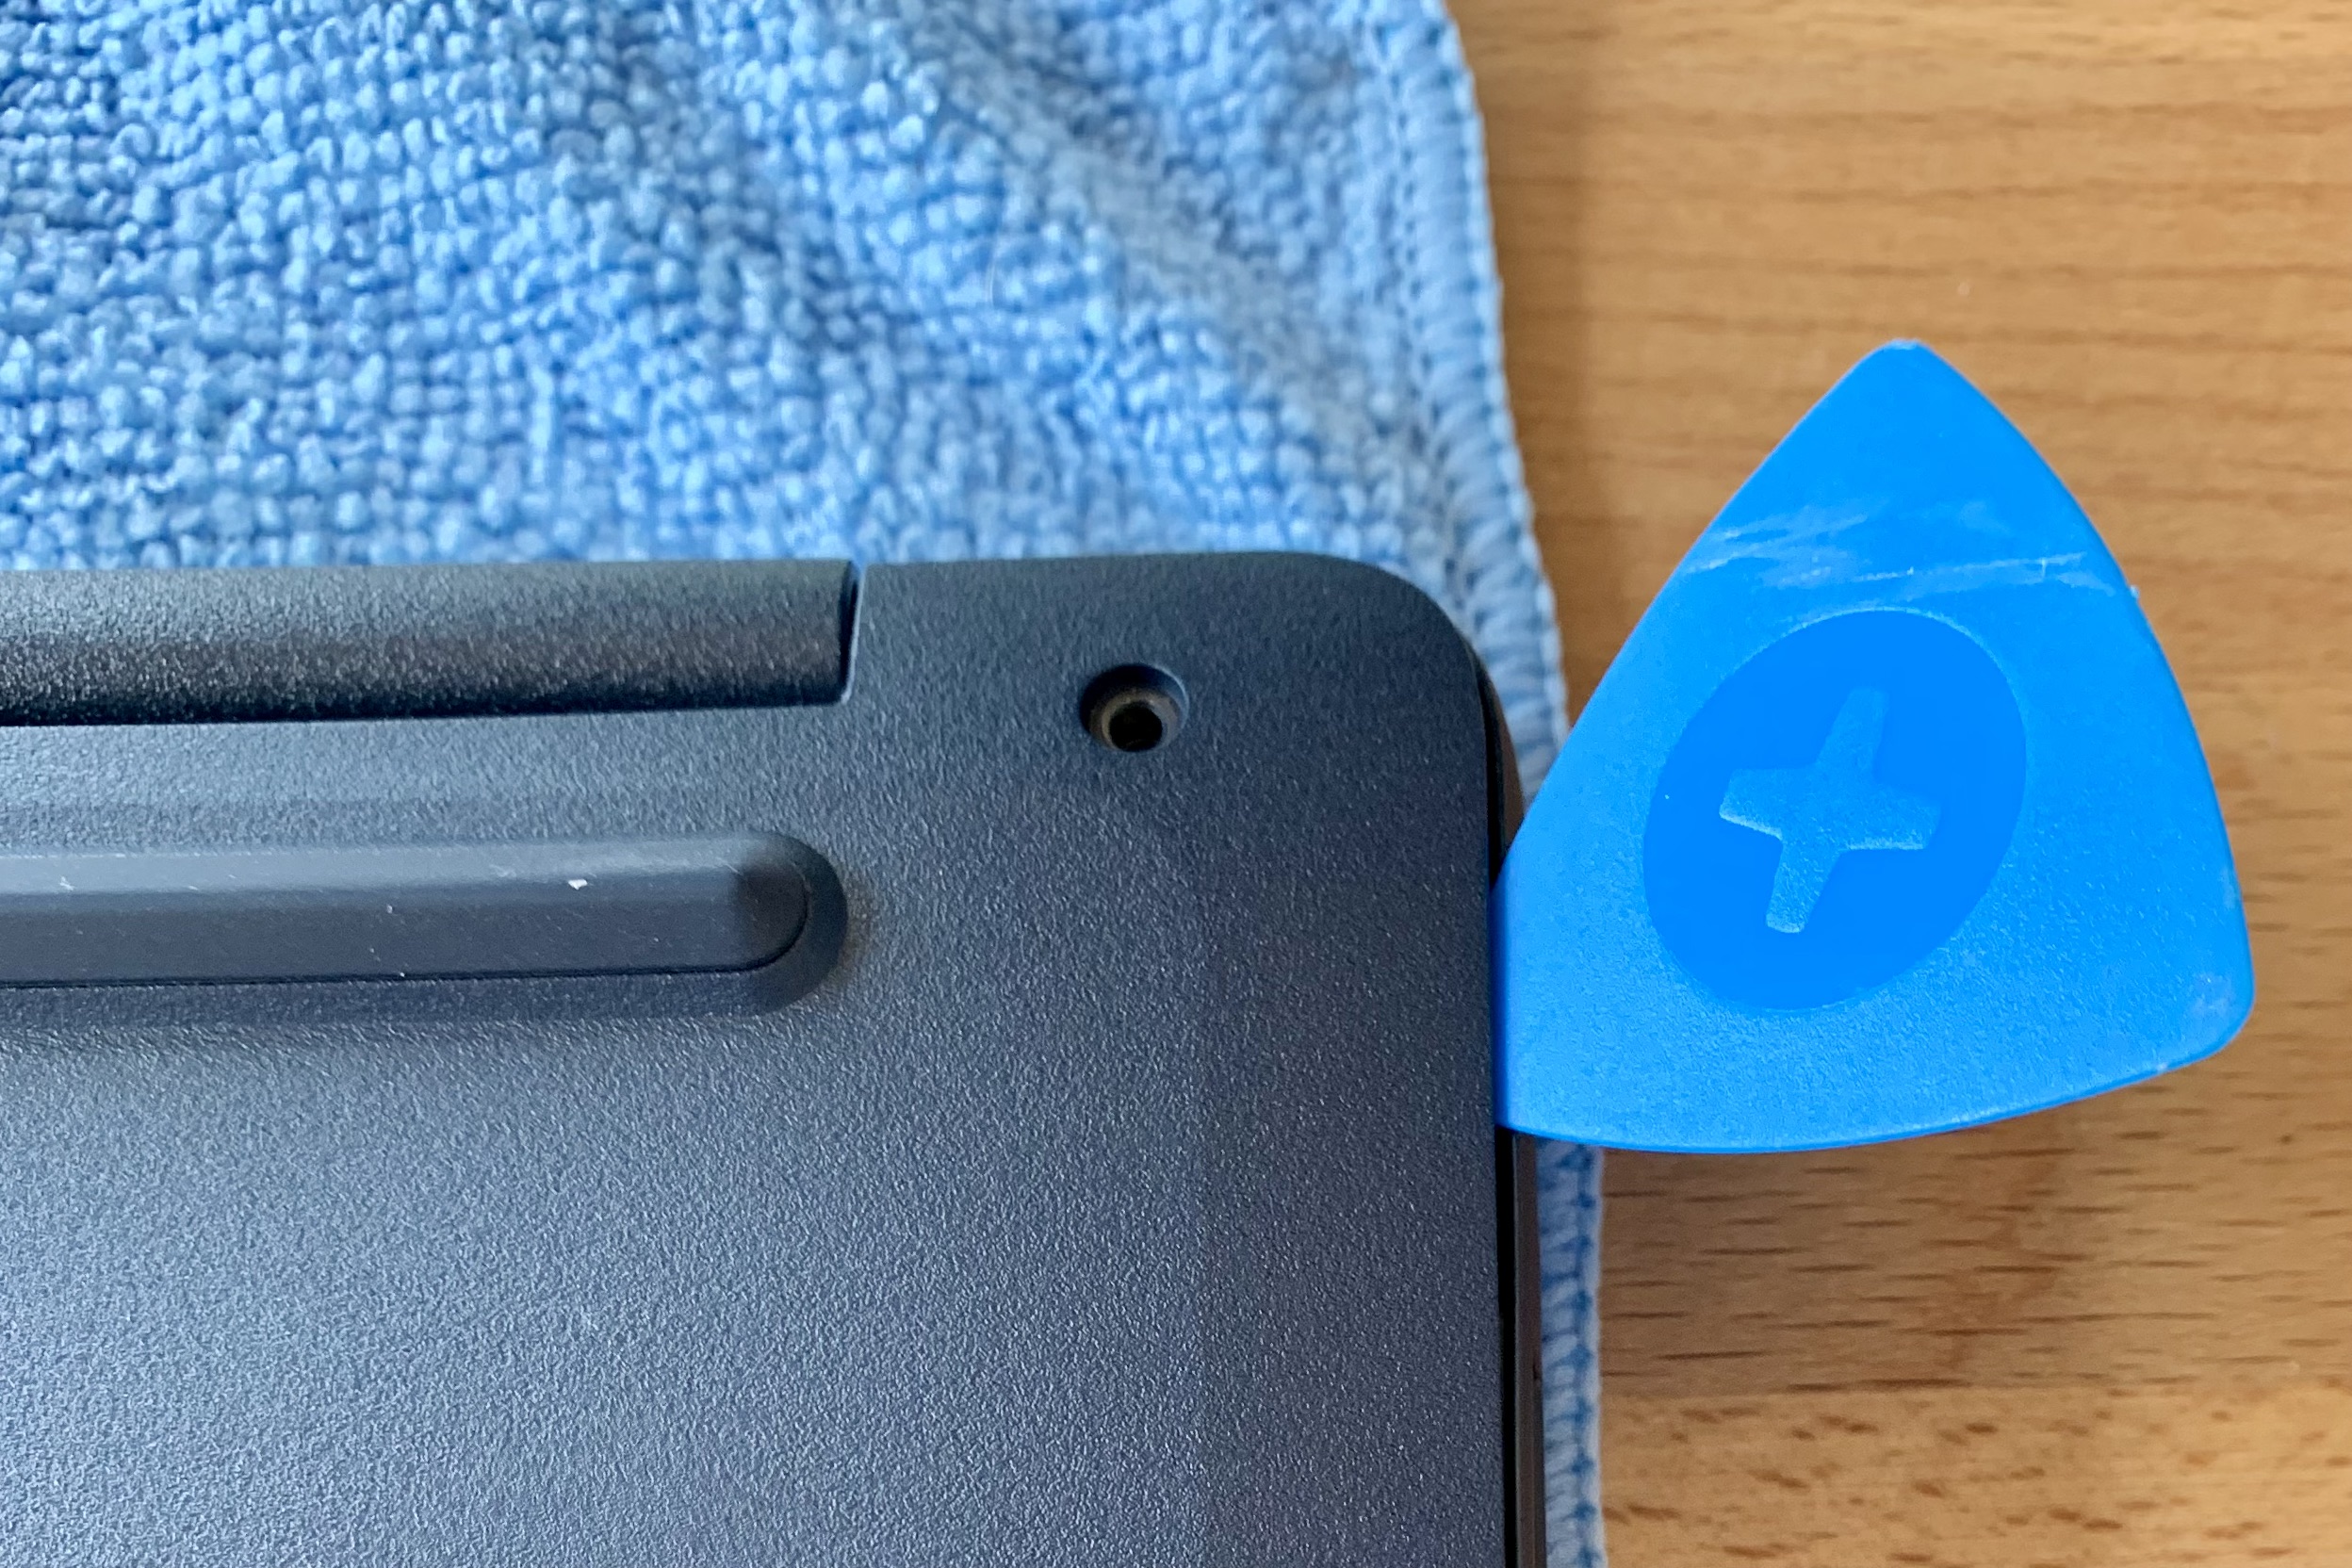
Proceed by removing the ten screws from the back, taking note of the specific placement of the four shorter screws. Exercise caution while using a pick or putty knife to gently open the tabs, being mindful not to insert the tool deeper than approximately 3 mm.
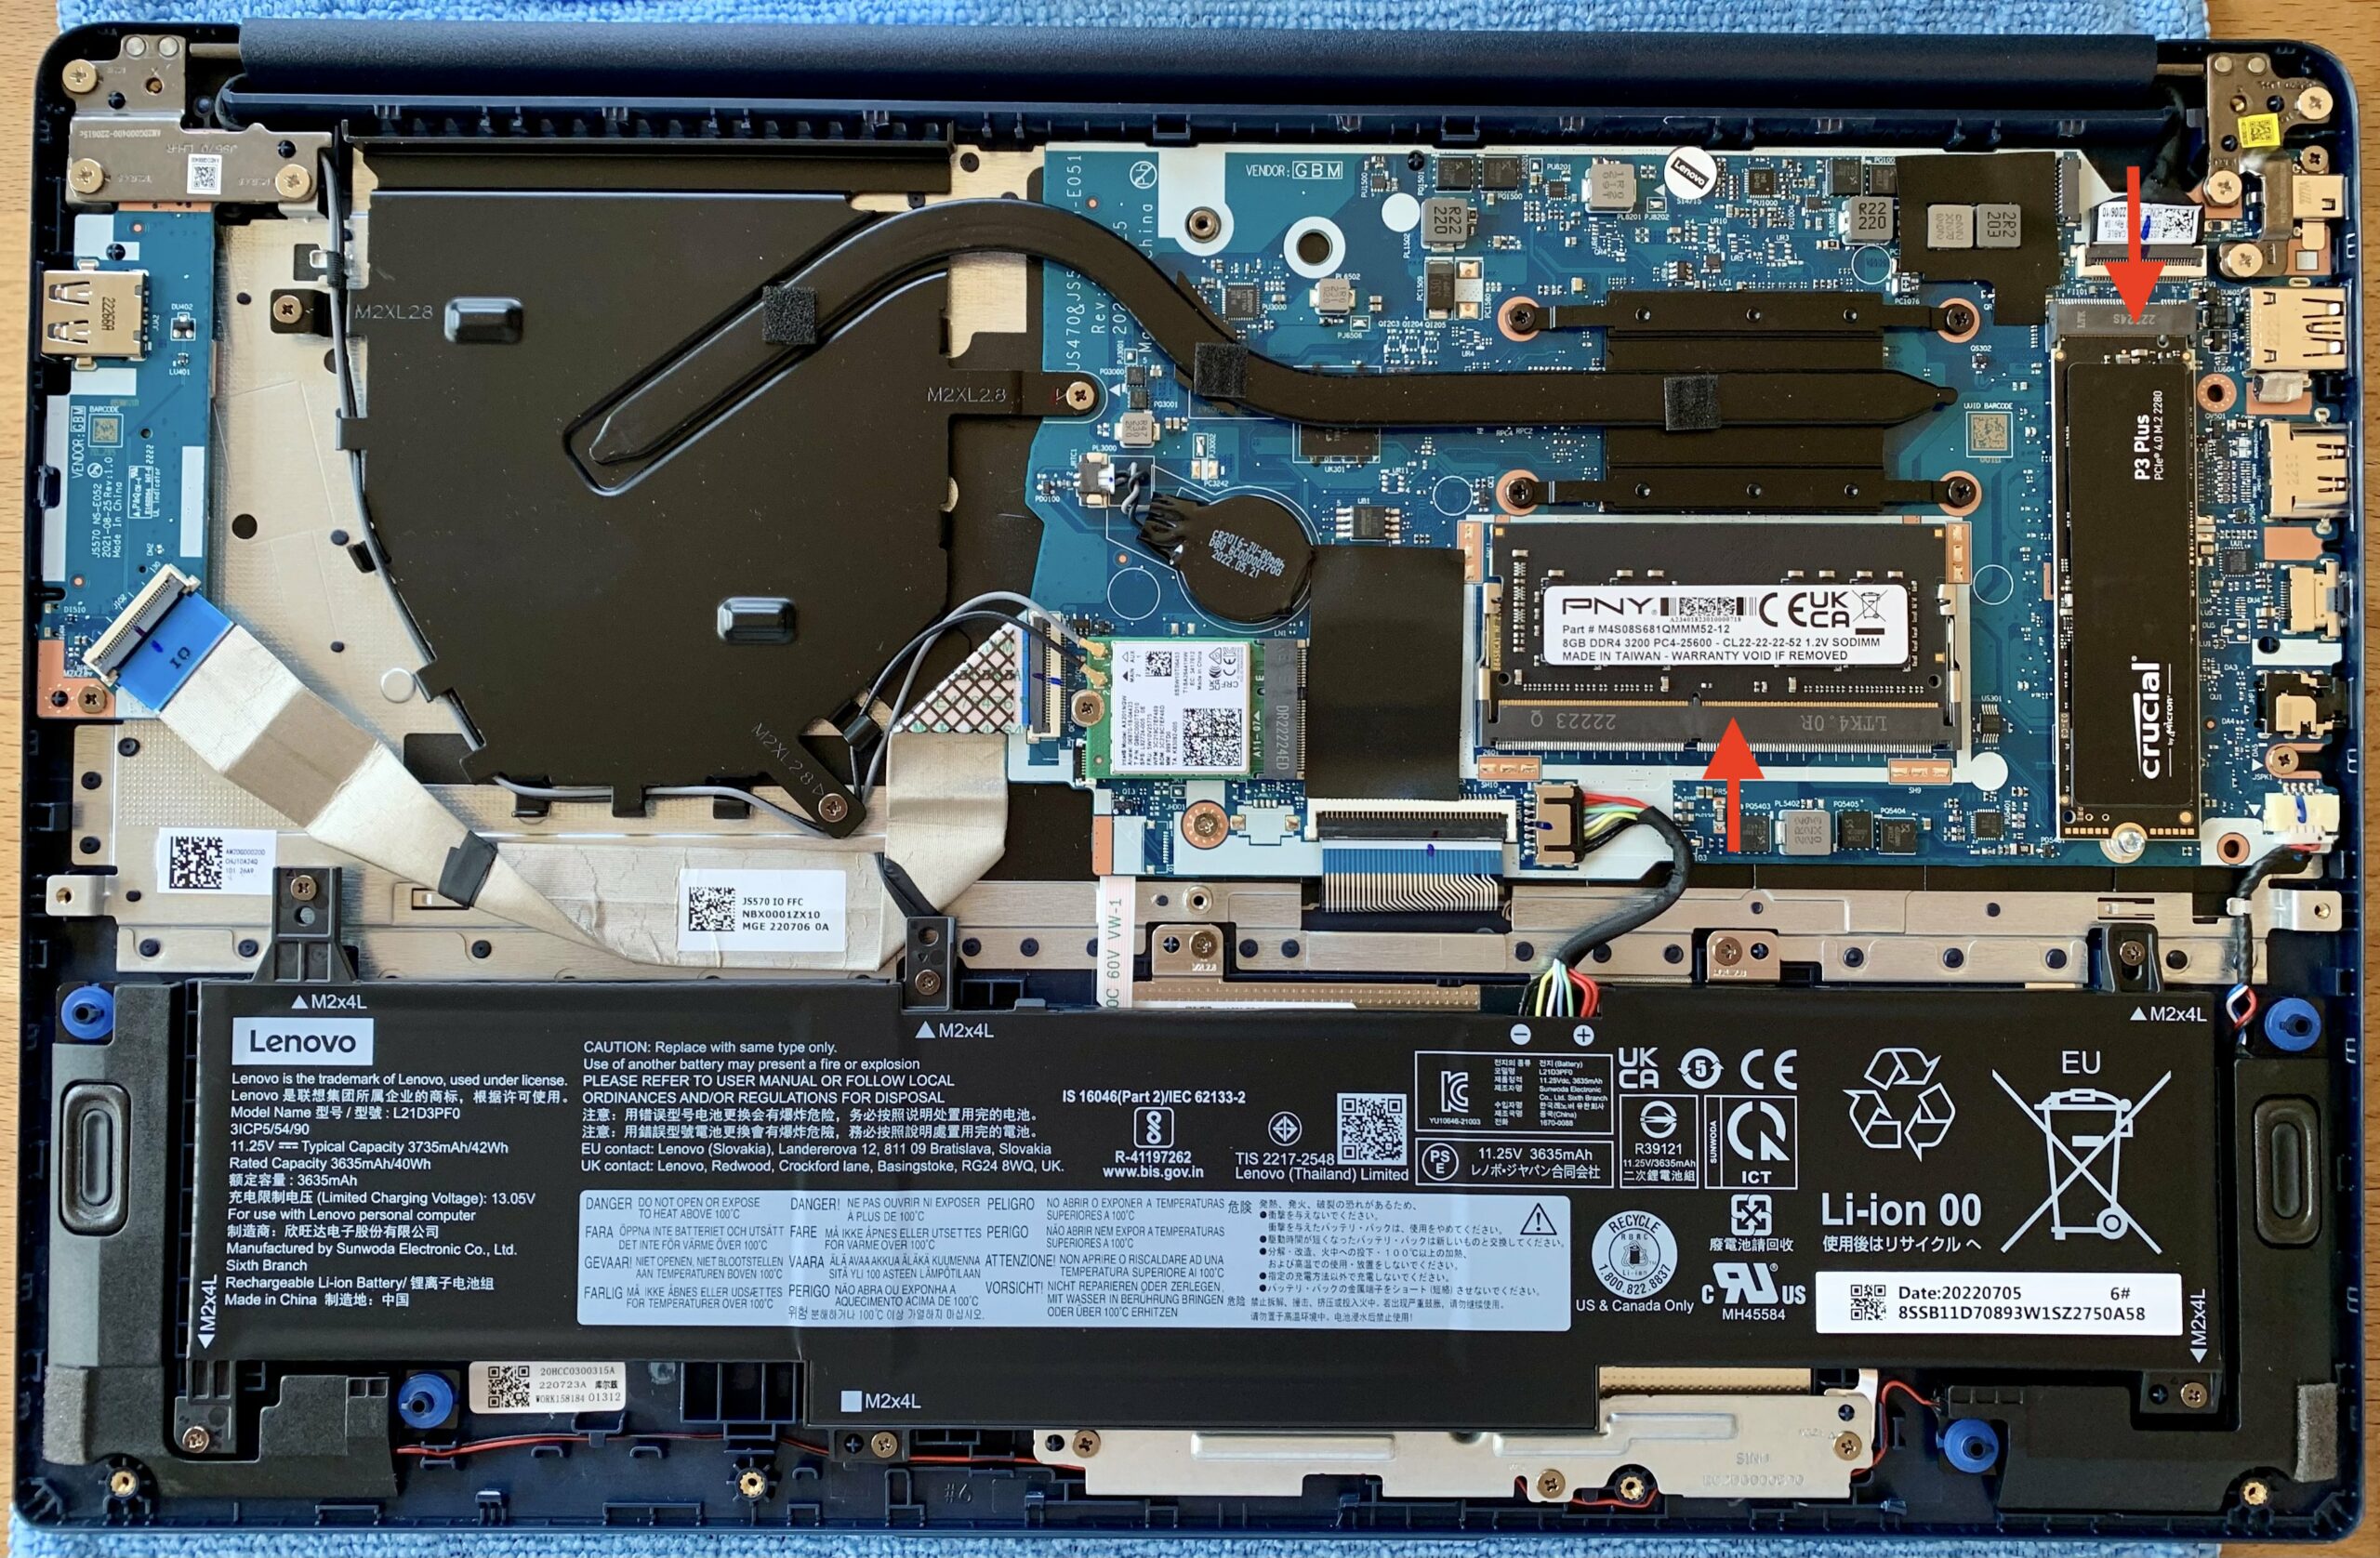
Locate the free DRAM slot, slide the module in at a 45 degrees angle, and push it down. If you have never installed a memory module before, watch this short video.
Now locate the slot for SSD, insert it, and secure it with the provided screw. Here is a related video.
Put the lid back on, press it down, and make sure you hear all the tabs snapping back into place again. Finally, put the ten screws back into place. Insert the power cable and start the device. (Don’t worry if the SSD doesn’t show up.)
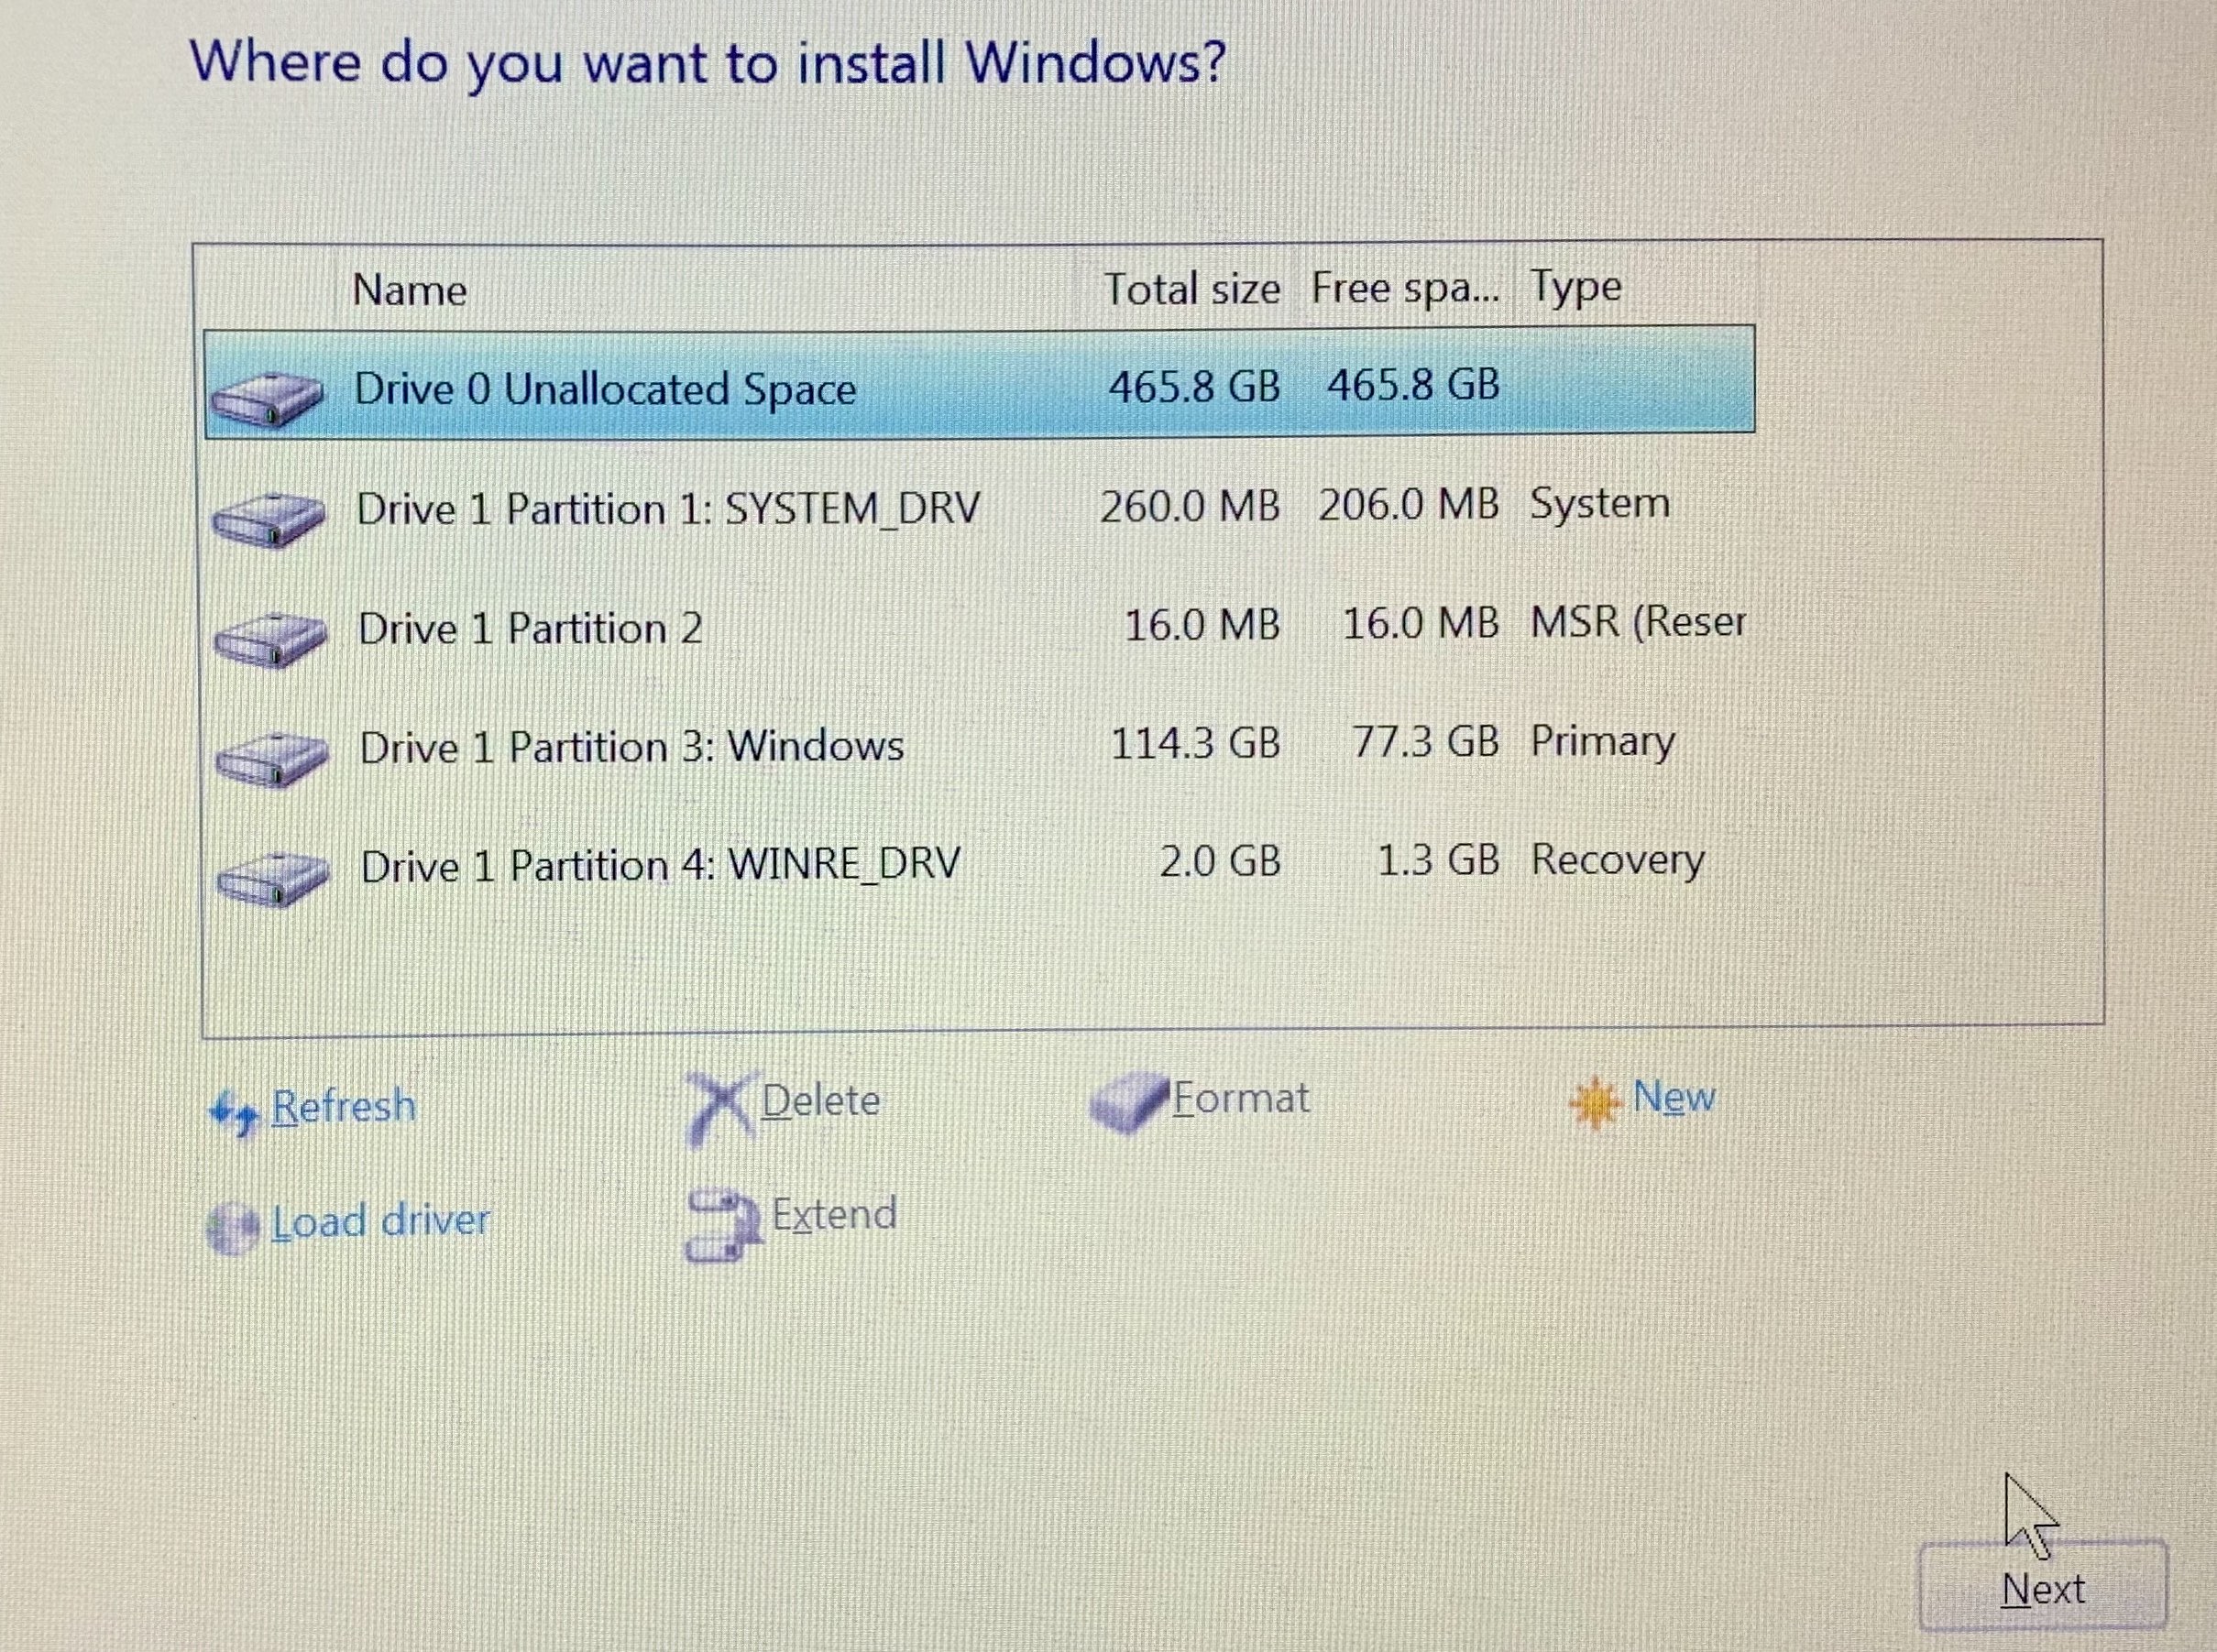
Installing Windows Cleanly
Before beginning the Windows installation process, power off the computer, insert the USB Drive, and press Fn and the power button to access the “Novo Menu.” Open the Boot Menu and select booting from the USB Drive. Follow the installation steps, designating the 500GB drive as the destination while leaving the 128GB eMMC drive as is for the time being. Personally, I opted to remove all partitions on the eMMC drive during this phase. Despite privacy precautions taken during installation, you may find several pre-installed apps (Instagram, Spotify, Xbox, etc.), most of which can be easily removed later. Less is more in the realm of Windows, whenever possible.
Throughout the installation and setup, be aware that the laptop’s touchpad won’t function, requiring the use of the USB mouse for navigation. Once Windows 11 is successfully installed and updated, installing Lenovo Vantage becomes crucial, as it facilitates the remapping of function keys for screen brightness, volume, etc. For those feeling uncertain about the clean installation process, seeking reassurance on the Lenovo Forum can provide words of comfort.
Following the Windows setup, I installed Python and PyCharm, removed unnecessary apps, set up Chrome as the default browser, and switched the default search engine to Google. With these adjustments, the laptop now operates smoothly, and the keyboard is proving to be enjoyable. However, it’s essential to acknowledge that while this is a capable device, it doesn’t rival the performance of a MacBook Air with an M2 chip, albeit at a significantly higher cost.
""" Let's see how the IdeaPad 1 is performing """
from time import process_time as time

num_of_primes = 100_000
print(f"Finding {num_of_primes:,} Primes ...")

t0 = time()
primes = [2]
t = 1

while len(primes) < num_of_primes:
    t += 2
    for p in primes:
        if t % p == 0:
            break  # is not prime
        elif p*p > t:
            primes.append(t)
            break
dt = time() - t0
print(primes)
print(f"Found {num_of_primes:,} prime numbers in {dt} secs.")

Installing Linux
Installing Linux was more involved than I had originally anticipated. I reused the USB drive to create a bootable Ubuntu USB drive.
https://ubuntu.com/tutorials/create-a-usb-stick-on-windows#1-overview
Once that was done, I booted into the “novo menu” to select to boot from the USB drive.
I skipped the wifi setup and selected the minimal installation.

Next, I selected the slow 128GB Toshiba drive /dev/mcblk0 and created a new Partition Table.
I create two partitions: EFI (300MB) and EXT4 mounting to “/” with the remaining memory. It took a while, but Ubuntu can now be booted from the original hard drive (using the “novo menu”.)
Conclusion
At the project’s outset, uncertainty loomed over its outcome. Investing $200 might be deemed a gamble by some. Having not owned a Windows computer in two decades, the experience proved insightful, surpassing initial expectations. It provided a deeper understanding of Windows and laptops within that ecosystem, as well as insights into storage modules like M.2, mSATA, SATA and NVMe.
Most importantly, this endeavor revealed that even for students on a tight budget, $220 could secure a computer capable of meeting the demands of academic coursework. Removing all the stickers, the laptop’s very dark blue appearance takes on a cool demeanor in dark mode.
Most importantly, this endeavor revealed that even for students on a tight budget, about $200 could secure a computer capable of meeting the demands of academic coursework. Removing all the stickers, the laptop’s very dark blue appearance takes on a cool demeanor in dark mode.

Fall 2023 Update
As of December 2023, the Lenovo IdeaPad 1-15IJL7 can still be found at Costco (online) for $149, on Amazon for $199, and Target offers it refurbished for $175.
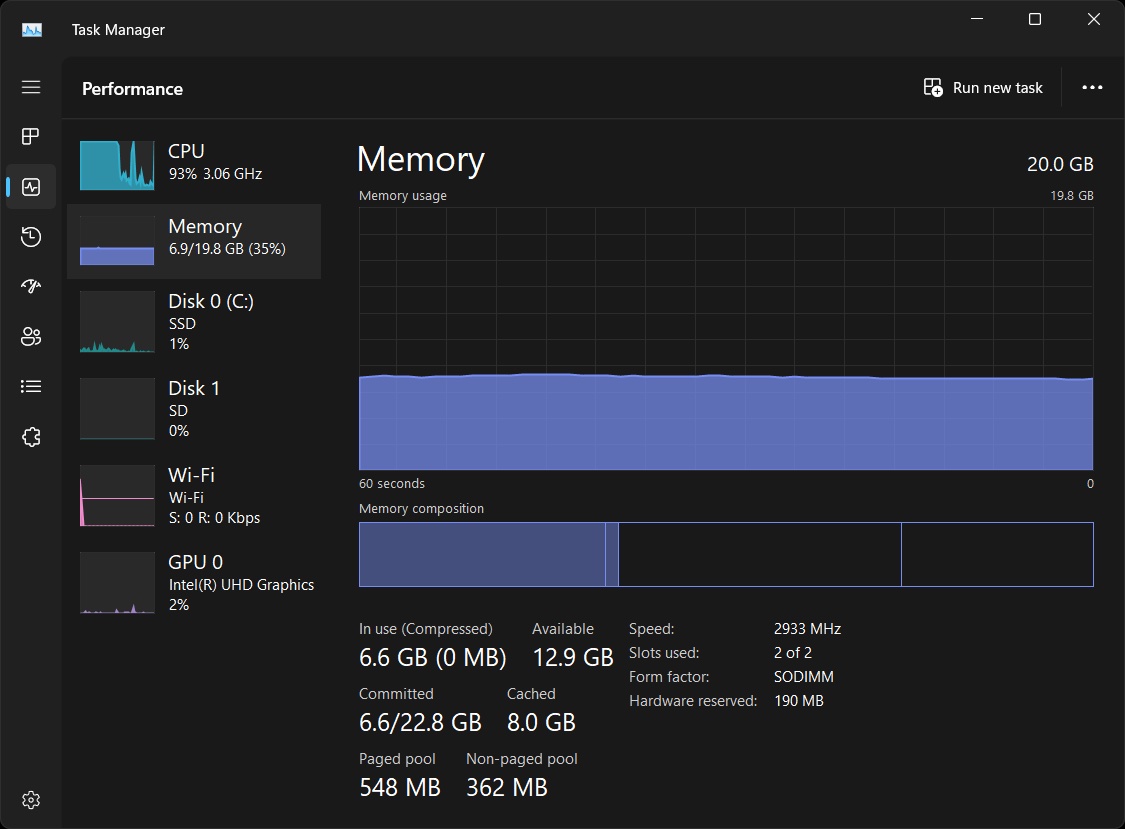
While the PSREF (Product Specifications IdeaPad 1 15IJL7 Reference), last updated on December 1st 2023, states the maximum memory as follows:
• Up to 4GB (4GB soldered + empty SO-DIMM slot) DDR4-2933 offering
• Up to 8GB (8GB SO-DIMM) DDR4-2933 offering
There is also this footnote: “The max memory is based on the test results with current Lenovo memory offerings.”
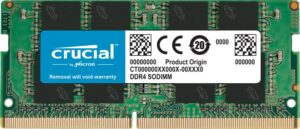
I gave it try and upgraded the system RAM yet again, this time with a Crucial RAM 16GB DDR4 3200MHz CL22 (or 2933MHz or 2666MHz) Laptop Memory CT16G4SFRA32A module ($40). Lenovo kept updating the system drivers all year long and I don’t know if a driver update was required, but the now available 20GB of RAM seem to be working just fine.
This is a great write up! Considering buying one of these myself and want to immediately forget the Windows partition and use Linux from the get go.
Is there any reason you put Linux on. the original drive rather than the new Crucial drive?
I would put the OS that will be used the most on the faster SSD. If Linux and Windows are both used a lot, I’d create partitions for both on the faster drive.
I put Windows on the Crucial drive since I guess I will be using mostly Windows 11 on the laptop. Moreover there is WSL now, Windows Subsystem for Linux, which is not bad, if all you need is a Linux Terminal.
Thanks for the quick reply. If I end up buying it, I will let you know how it goes!