In the new world of micro-services and micro-applications, push notifications are an important and sometimes even the exclusive way to get information to mobile/wearable applications.
The term Micro Application is not fully established yet. I use it here to describe an application that is deployed on a mobile or wearable device with the purpose to receive notifications, issued from a remote (software-)sensor. Should the sensor also be available wrapped in a service, then the micro-application may also take the initiative and send a request.
More importantly however, if a received notification is actionable, the micro-application implements action-handlers and accepts user input that triggers those handlers.
To reach mobile devices running Android, Google’s Cloud Messaging Service is probably the most reliable, scalable, and certainly the most economical way to send push notifications. Each notification can cary a payload up to 4KB and the service is absolutely free, no matter how many notifications are sent. Since Google’s service can bundle messages from several senders targeting the same device, it is also economical with regards to battery and network usage on the mobile or wearable device.
Newly added features include that the GCM Service cannot only push to Android devices, but also to iOS devices, and to Google Chrome browsers running on the desktop. Another new feature in Google’s Cloud Messaging Service is Topic Messaging. From the server side, sending messages to a topic is very similar to sending messages to an individual device. The app server sets the address to /topics/myTopic. Topic names don’t clash, since the HTTP POST request also contains the GCM API-KEY, thereby making them unique to the app. Expect up to 30 seconds of delay before the GCM Connection Server returns a success or failure response to the topic send request.
- GCM is used by 600,000 applications
- GCM processes 1.1 million requests per second
- GCM reaches 1.5 billion devices
- If the targeted device is online, delivering a message takes on average 50 ms. 95% of all messages are delivered in 173ms
- Message Multicasting: Sending a message to 1,000 devices, (providing 1,000 Registration-Tokens)
- Device Group Messaging: Sending a message to all devices (up to 20) in the group using a notification-key.
- A device can also send a message to the other devices in the same group
- Topic Messaging: send the same message to up to 1 million devices that have subscribed to the topic.
Content
- Acquiring credentials to use Google’s push notification infrastructure
- Writing an Android app, receiving notifications and displaying them on a paired Android Wear watch
- Writing a sever-side Java application, sending push notifications
- Closing the loop
1. Acquiring credentials to use Google’s push notification infrastructure.
GCM Project ID and Project Number
Using the sign-up process at //developers.google.com/mobile/add?platform=android you can request to add cloud messaging to an already existing project (app), or to a new project.

Here for instance, I created a new project ‘PushDemo’ and declared the package name, which I intended to use, when implementing the Android mobile app. In the following step, I selected and enabled the ‘Cloud Messaging’ service.

Eventually, ‘Continue to Generate configuration file’ can be selected, advancing the sign-up process to download the configuration file.
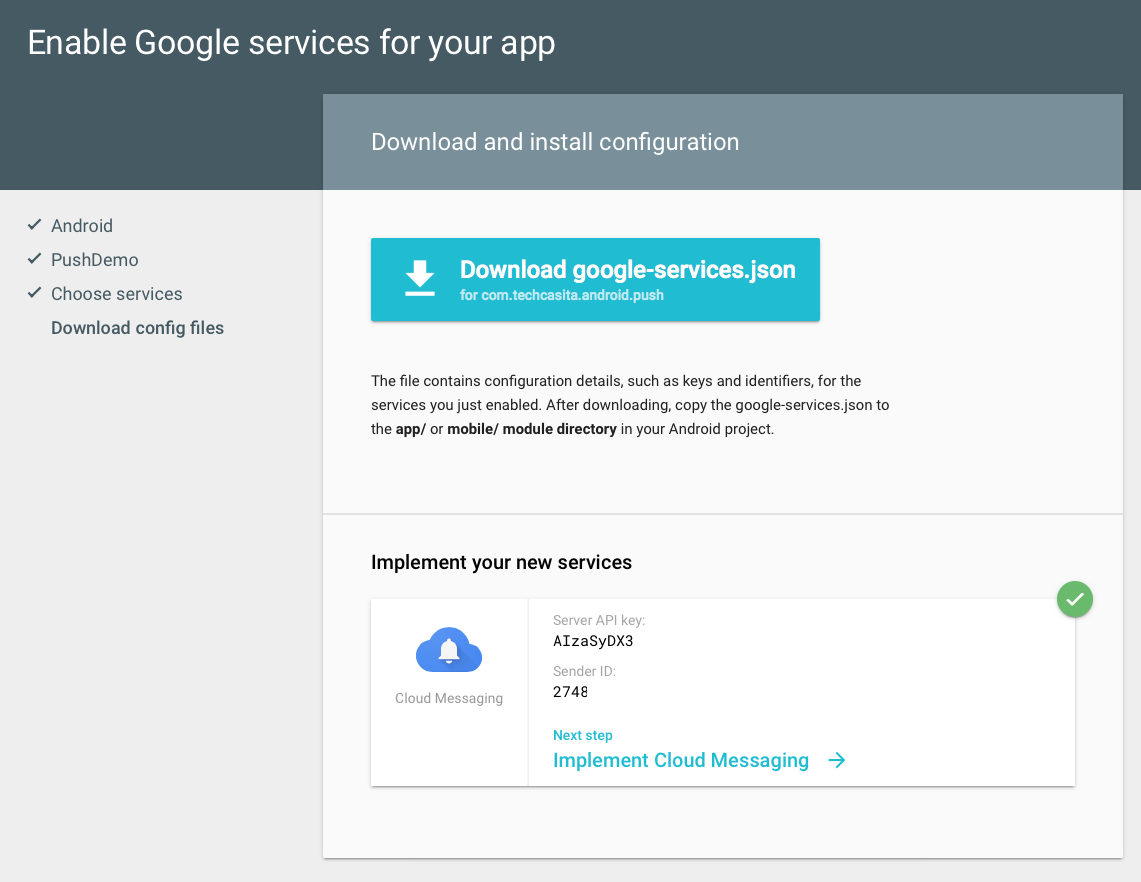
The project configuration that was created or modified during the signup process, can be edited later, by logging into the Google Developers Console with your google account (e.g. gmail address). The PushDemo project for instance show up like this:

2. Writing an Android app, receiving notifications and displaying them on a paired Android Wear watch.
The google-service.json configuration file, created during the sign-up process, needs to be inserted into the Android project’s app folder, basically becoming a sibling to the app-level build.gradle file. Both, the project-level and the app-level build.gradle files need to be updated to include new dependencies, like so:
2.1. Configuration
2.1.1. Project-level build.gradle
// Top-level build file where you can add configuration options common to all sub-projects/modules.

buildscript {
    repositories {
        jcenter()
    }
    dependencies {
        classpath 'com.android.tools.build:gradle:1.2.3'
        classpath 'com.google.gms:google-services:1.3.0-beta1'
    }
}

allprojects {
    repositories {
        jcenter()
    }
}
2.1.2. App-level build.gradle
apply plugin: 'com.android.application'
apply plugin: 'com.google.gms.google-services'

android {
    compileSdkVersion 22
    buildToolsVersion "22.0.1"

    defaultConfig {
        applicationId "com.techcasita.android.push"
        minSdkVersion 18
        targetSdkVersion 22
        versionCode 1000
        versionName "1.0"
    }
    buildTypes {
        release {
            minifyEnabled false
            proguardFiles getDefaultProguardFile('proguard-android.txt'), 'proguard-rules.pro'
        }
    }
}

dependencies {
    compile fileTree(dir: 'libs', include: ['*.jar'])
    compile 'com.android.support:support-v4:22.2.0'
    compile "com.google.android.gms:play-services:7.5.0"
}
2.1.3. Google-service.json configuration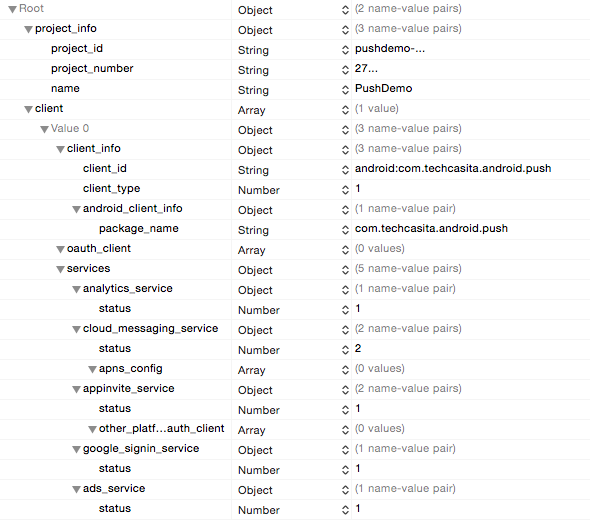

The Android client app consuming and reacting to an incoming push notification, needs be be built with the Google Play Services SDK, which was added as a dependency in the app-level build.gradle. The most minimal AndroidManifest.xml for an app, would look something like this:
<?xml version="1.0" encoding="utf-8"?>
<manifest xmlns:android="http://schemas.android.com/apk/res/android" package="com.techcasita.android.push">
    <uses-permission android:name="com.google.android.c2dm.permission.RECEIVE"/>
    <uses-permission android:name="android.permission.WAKE_LOCK"/>
    <application android:allowBackup="true" android:icon="@mipmap/ic_launcher" android:label="@string/app_name" android:theme="@style/AppTheme">
        <activity android:name=".MainActivity" android:label="@string/app_name">
            <intent-filter>
                <action android:name="android.intent.action.MAIN"/>
                <category android:name="android.intent.category.LAUNCHER"/>
            </intent-filter>
        </activity>
        <receiver android:name="com.google.android.gms.gcm.GcmReceiver" android:exported="true" android:permission="com.google.android.c2dm.permission.SEND">
            <intent-filter>
                <action android:name="com.google.android.c2dm.intent.RECEIVE"/>
                <action android:name="com.google.android.c2dm.intent.REGISTRATION"/>
                <category android:name="com.techcasita.android.push"/>
            </intent-filter>
        </receiver>
        <service android:name=".MyGcmListenerService" android:exported="false">
            <intent-filter>
                <action android:name="com.google.android.c2dm.intent.RECEIVE"/>
            </intent-filter>
        </service>
        <service android:name=".MyInstanceIDListenerService" android:exported="false">
            <intent-filter>
                <action android:name="com.google.android.gms.iid.InstanceID"/>
            </intent-filter>
        </service>
        <service android:name=".RegistrationIntentService" android:exported="false">
        </service>
    </application>
</manifest>
Besides the main activity, the AndroidManifest declares required permissions, a BroadcastReceiver, and three local services, i.e. other applications cannot invoke or interact with them.
2.2. Receiving a Push Notification
Since the Android client application should be able to receive notifications, even when it’s not running in the foreground, it needs to provide a BroadcastReceiver that captures and acts on incoming push notifications. For that we can use the ready made com.google.android.gms.gcm.GcmReceiver and providing it with the intent-filter shown in the AndroidManifest.
If the received intent’s action was “com.google.android.c2dm.intent.RECEIVE”, the BroadcastReceiver will call startWakefulService with that action. However, if the received action was “com.google.android.c2dm.intent.REGISTRATION”, it will call startWakefulService with intent.setAction(“com.google.android.gms.iid.InstanceID”);
For both of these actions, we implement a service, like declared in the AndroidManifest above.
2.2.1. GcmListenerService
MyGcmListenerService extends the provided GcmListenerService and is the place where the incoming message gets actually handled, e.g. the payload gets extracted and put to work…
public class MyGcmListenerService extends GcmListenerService {

    @Override
    public void onMessageReceived(String from, Bundle data) {
        String message = data.getString("message");

    }
}
2.2.2. InstanceIDListenerService
MyInstanceIDListenerService extends the provided InstanceIDListenerService, which will simply call startService with RegistrationIntentService.class (see below). While startService(new Intent(this, RegistrationIntentService.class)) will be called from the MainActivity’s onCreate() method, every time the app launches. Initially, the InstanceID/Security-token (a.k.a RegistrationToken) gets generated and then cached for subsequent use.
public class MyInstanceIDListenerService extends InstanceIDListenerService {
    /**
     * Called if InstanceID token is updated.
     * May occur if the security of the previous token had been compromised
     * and is initiated by the InstanceID provider.
     */
    @Override
    public void onTokenRefresh() {
        // Fetch updated Instance ID token and notify our app's server of any changes (if applicable).
        startService(new Intent(this, RegistrationIntentService.class));
    }
}
2.2.3. RegistrationIntentService
class RegistrationIntentService extends IntentService {
    private static final String tag="RegistrationIntentService.class.getSimpleName();"
    private static final String["RegistrationIntentService"] TOPICS = {"global"};

    public RegistrationIntentService() {
        super(TAG);
    }

    @Override
    protected void onHandleIntent(Intent intent) {
        SharedPreferences sharedPreferences = PreferenceManager.getDefaultSharedPreferences(this);

        try {
            synchronized (TAG) {
                // Initially a network call, to retrieve the token, subsequent calls are local.
                InstanceID instanceID = InstanceID.getInstance(this);
                String token = instanceID.getToken(getString(R.string.gcm_defaultSenderId), GoogleCloudMessaging.INSTANCE_ID_SCOPE, null);
                Log.i(TAG, "GCM Registration Token: " + token);

                // TODO: send any registration to my app's servers, if applicable.
                // e.g. sendRegistrationToServer(token);

                // TODO: Subscribe to topic channels, if applicable.
                // e.g. for (String topic : TOPICS) {
                //          GcmPubSub pubSub = GcmPubSub.getInstance(this);
                //          pubSub.subscribe(token, "/topics/" + topic, null);
                //       }

                sharedPreferences.edit().putBoolean(getString(R.string.pref_key_SENT_TOKEN_TO_SERVER), true).apply();
            }
        } catch (Exception e) {
            Log.d(TAG, "Failed to complete token refresh", e);
            sharedPreferences.edit().putBoolean(getString(R.string.pref_key_SENT_TOKEN_TO_SERVER), false).apply();
        }
        // Notify UI that registration has completed, so the progress indicator can be hidden.
        LocalBroadcastManager.getInstance(this).sendBroadcast(new Intent(getString(R.string.intent_name_REGISTRATION_COMPLETE)));
    }
}
Like mentioned above, the RegistrationIntentService gets called to generate an security token. The instanceID.getToken(..) call generates the token, sending the the “defaultSenderId” and “INSTANCE_ID_SCOPE” as parameters back to the GCM Server. It’s not immediately obvious, but the defaultSenderId is the GCM project_number, which is magically inserted into the app’s resources (originated in the google-service.son file of course) and the the INSTANCE_ID_SCOPE is just a String (“GCM”).
This token, in the context of GCM also known as the registration token, is needed to be stored on the app-server and is used to send a message to the device.
The code also show how to subscribe a registration token to a topic, unsubscribing works the same way. However, the whole topic string must match this regular expression /topics/[a-zA-Z0-9-_.~%]{1,900} basically saying that a topic name can be between 1 and 900 characters long and only contain letter A to z and a very few special character, but no spaces.
Finally, startService(new Intent(this, RegistrationIntentService.class)) in the MainActivities OnCreate method will kick things off.
2. Writing a sever-side Java application, sending push notifications
The server component of the push notification solution is necessary, because it will send the notifications (containing the payload) to Google’s GCM server. Also, Google’s server may request a re-sent, which our server must be able to respond to, and it also plays a role in the user device registration process.
A Google cloud message can be send-to-sync a.k.a. collapsed, where each new message replaces the preceding message, or as message with payload a.k.a. non-collapsible message, where each individual message is delivered. In this example, I will only use messages with payload, using an HTTP connection server.
A reference implementation of the server component in Java can be found in a git repository here: //code.google.com/p/gcm. Using a git command line client, the source can be fetched, like so:
git clone //code.google.com/p/gcm/
This will create a directory tree in ~/gcm that looks something like this:
./
../
.git/
LICENSE
gcm-client/
gcm-client-deprecated/
gcm-server/
samples/
The gcm-server contains the core server implementation, and the Java Web application related implementation can be found here: ~/gcm/samples/gcm-demo-server.
The following steps will create a deployable WAR file. However, before building it, copy your previously created API key into this file: ~/gcm/samples/gcm-demo-server/WebContent/WEB-INF/classes/api.key
- Write the server key into ~/gcm/samples/gcm-demo-server/WebContent/WEB-INF/classes/api.key
- cd ~/gcm/gcm-server
- ant update-demo (which will create and copy the gcm-server.jar into ~/gcm/samples/gcm-demo-server/WebContent/WEB-INF/lib)
- cd ../samples/gcm-demo-server
- ant dist (which will create the gcm-demo.war here: ~/gcm/samples/gcm-demo-server/dist
Running the Server
Running the project locally in Tomcat may look like this:
http://localhost:8080

http://localhost:8080/home

And here is the project view in IntelliJ:

4. Closing the Loop
With all components implemented and deployed, we can now install the mobile Android app on a phone, and once it’s launched for the first time, the server component should show a registered device like so:


So now that we have sent a notification to a specific Android phone, we have to revisit the Android phone application again, to interpret and act on the received information.
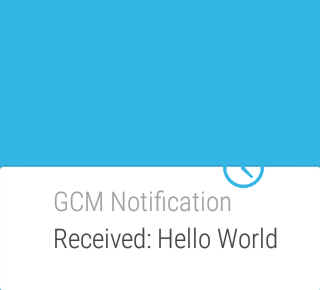
In the GcmIntentService, we use the incoming information, to populate a new android.app.Notification, which also gets decorated with Notification.BigTextStyle().
Finally, we use the NotificationManager to send the newly created notification with the notify method, which will make it available on paired Android Wear watches.

Identifying the Push Notification target
All this may sound involved and complicated, but it opens up incredible opportunities. I think it was back in 2009, or maybe even earlier, when I gave a talk titled “Turning the Web on its head – let’s have the Server call the Client“, which covered Comet-style protocols. GCM and push notifications allows us to do this easily and economically. However, to address or segment push targets efficiently, you may have to add additional information, when the client registers with the Java server component.
Here is the sendRegistrationIdToBackend() method that is used in the demo project, for instance sending a userId inform of an email address, acquired from the AccountManager, back to the server.
/**
  * Sends the registration ID to your server over HTTP, so it can use GCM/HTTP or CCS to send
  * messages to your app. Not needed for this demo since the device sends upstream messages
  * to a server that echoes back the message using the 'from' address in the message.
  */
 private void sendRegistrationIdToBackend(final String regId) {
     final String tag_json_obj = "json_obj_req";
     final String url = getString(R.string.GCM_BACKEND_URL) + "/register";
     final Map<String, String> params = new HashMap<String, String>();
     params.put("regId", regId);
     params.put("userId", AccountManager.get(this).getAccounts()[0].name);

     StringRequest sr = new StringRequest(
             Request.Method.POST,
             url,
             new Response.Listener<String>() {
                 @Override
                 public void onResponse(String response) {
                     Log.d(LOG_TAG, response.toString());

                 }
             },
             new Response.ErrorListener() {
                 @Override
                 public void onErrorResponse(VolleyError error) {
                     VolleyLog.d(LOG_TAG, "Error: " + error.getMessage());
                 }
             }) {
         @Override
         protected Map<String, String> getParams() {
             return params;
         }

         @Override
         public Map<String, String> getHeaders() throws AuthFailureError {
             Map<String, String> params = new HashMap<String, String>();
             params.put("Content-Type", "application/x-www-form-urlencoded");
             return params;
         }
     };

     // Adding request to request queue
     AppController.getInstance().addToRequestQueue(sr, tag_json_obj);
 }