- 1GHz, single-core CPU
- 512MB RAM
- 802.11 b/g/n wireless LAN
- Bluetooth 4.1
- Bluetooth Low Energy (BLE)
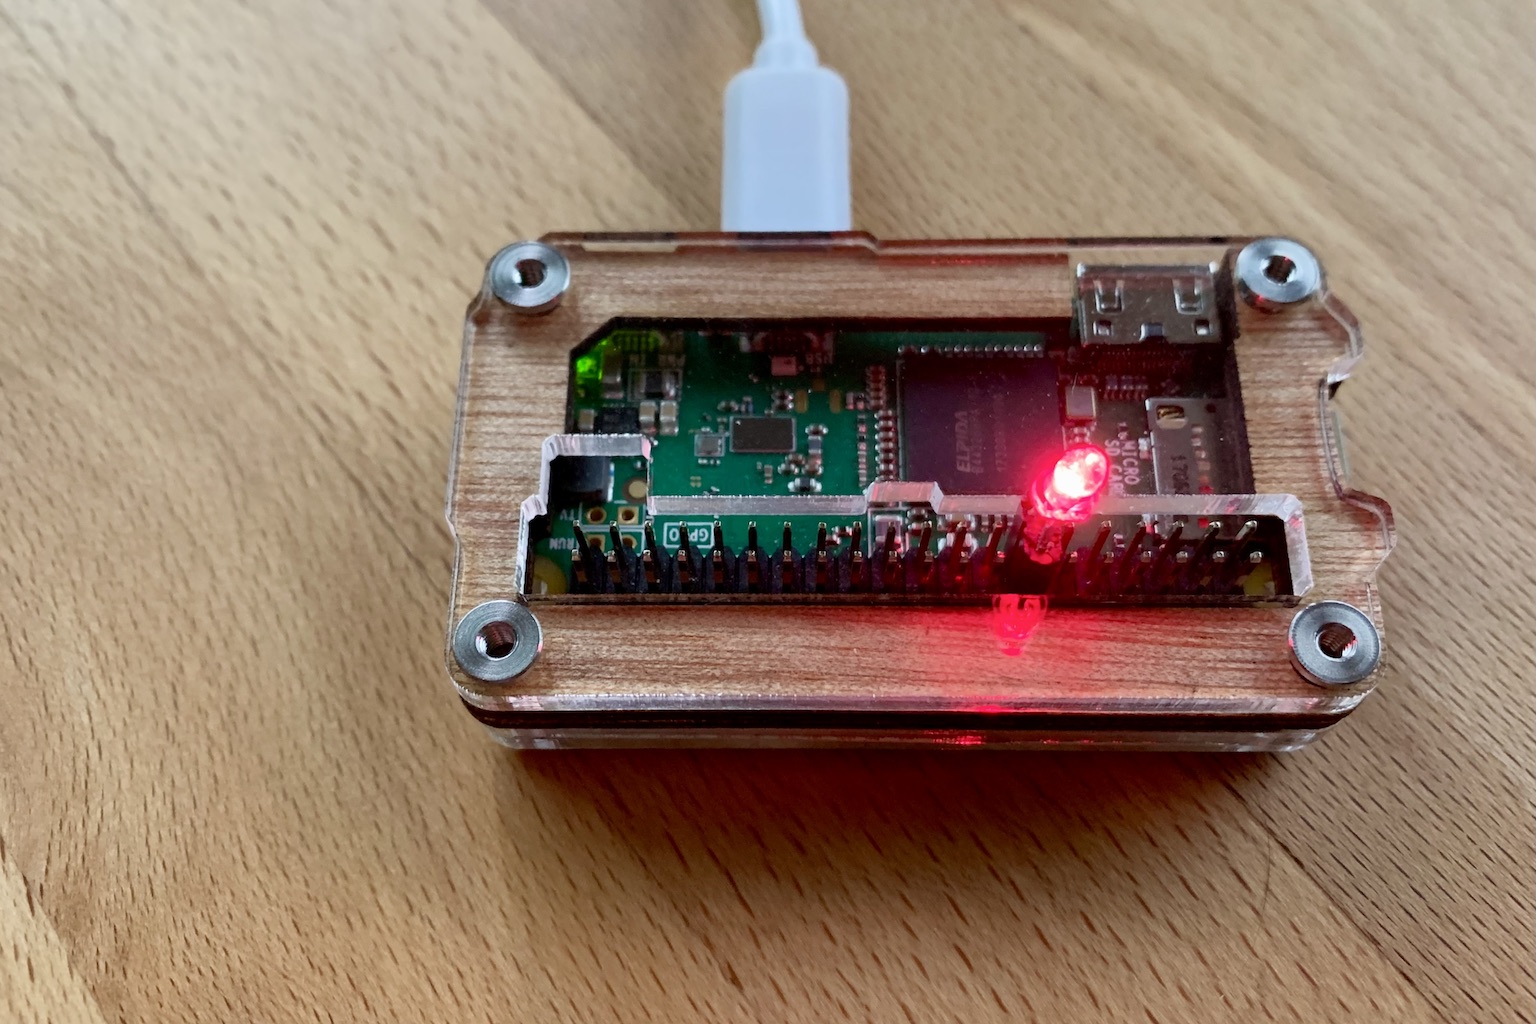
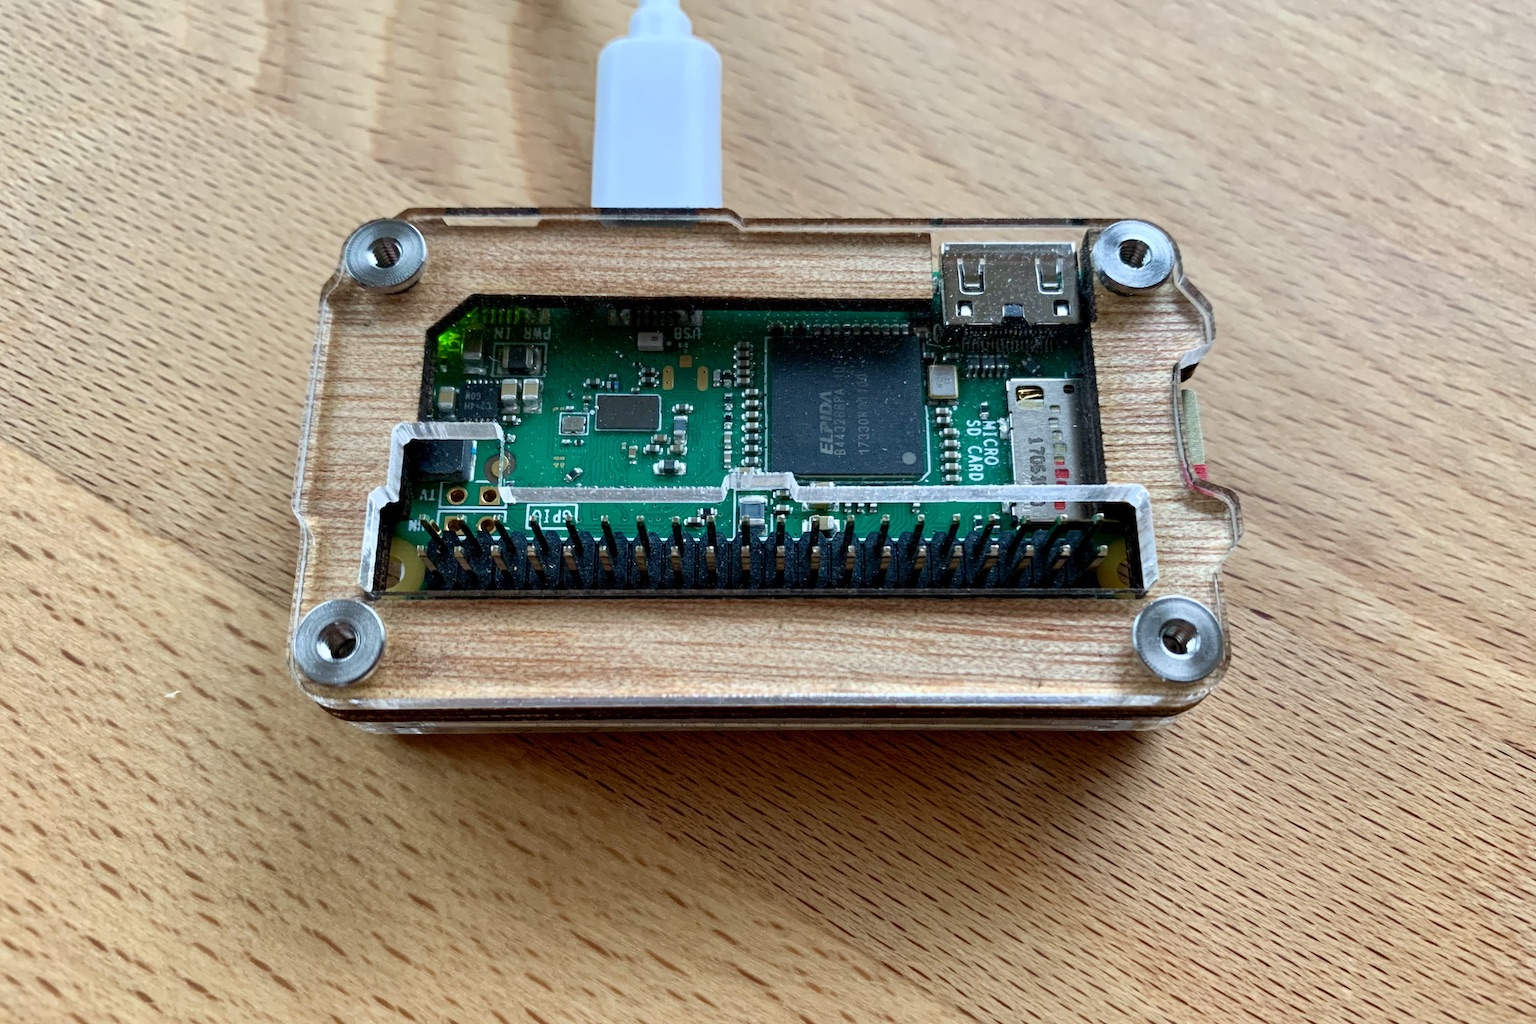
Case
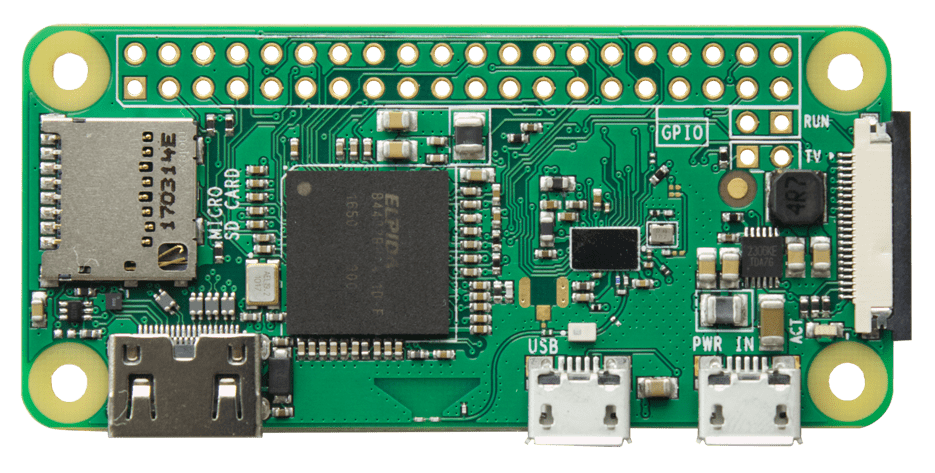
The Raspberry Pi Zero W V1.1 by far not the most powerful, but my favorite Raspberry Pi board, because it’s so very most and still capable enough. After putting the tiny board, weighing only 9.3g / 0.3oz into a nice case like this one maybe, it is time to bring it to life.
Linux OS
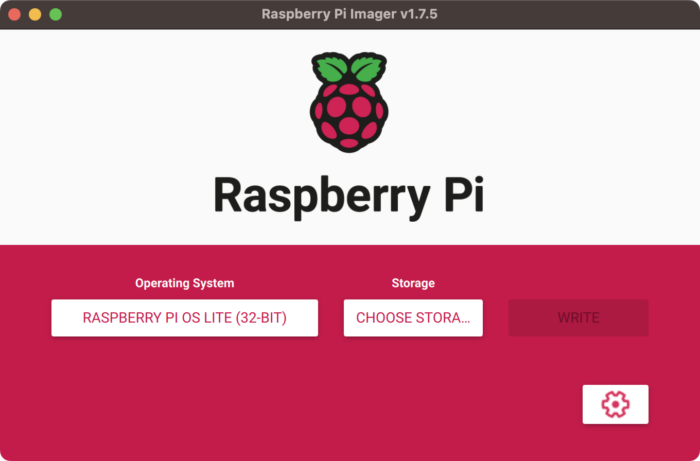
- Download the Imager app from the Raspberry Pi software page.
- Select a 32-BIT image without desktop components (aka LITE).
- Click the settings icon to set a hostname, enable ssh, configure your wifi ssid and password, etc.
- Insert a MicroSD Card (8Gb or larger) into your computer or card reader and let imager write the image.
If you need to change the wifi configuration, you can alway find it here: /etc/wpa_supplicant/wpa_supplicant.conf
E.g.
ctrl_interface=DIR=/var/run/wpa_supplicant GROUP=netdev
country=US
update_config=1

network={
    ssid="YOUR_SSID"
    psk="YOUR_PASSWORD"
    key_mgmt=WPA-PSK
}
Before imager had all these cool options, you needed to create an empty ssh file, to enable Secure Shell (SSH) when the Raspberry Pi boots up.
touch /Volumes/boot/ssh
SSH over USB
The previous step should put the Raspberry Pi on the configured Wifi network, but in case that fails, let’s also enable the option to ssh into the Raspberry Pi Zero over a USB connection:
Append dtoverlay=dwc2 to this file: /Volumes/bootfs/config.txt like so:
echo 'dtoverlay=dwc2'>>/Volumes/boot/config.txt
Using an editor like nano, to append ‘ modules-load=dwc2,g_ether‘ to /Volumes/bootfs/cmdline.txt after rootwait
1st Boot
At this point, the SDCard is ready to be inserted into the Raspberry Pi Zero. Connecting the device with another computer, using the center-most micro-USB socket, not only powers the Zero, but also allows to ssh into it. If you didn’t change it, the default host name is raspberrypi, the username is pi and by default the password is raspberry. Therefore:
Using ifconfig should now result in something like this:
lo: flags=73<UP,LOOPBACK,RUNNING>  mtu 65536
        inet 127.0.0.1  netmask 255.0.0.0
        inet6 ::1  prefixlen 128  scopeid 0x10
        loop  txqueuelen 1000  (Local Loopback)
        RX packets 0  bytes 0 (0.0 B)
        RX errors 0  dropped 0  overruns 0  frame 0
        TX packets 0  bytes 0 (0.0 B)
        TX errors 0  dropped 0 overruns 0  carrier 0  collisions 0

usb0: flags=4163<UP,BROADCAST,RUNNING,MULTICAST>  mtu 1500
        inet 169.254.63.5  netmask 255.255.0.0  broadcast 169.254.255.255
        inet6 fe80::9e85:8498:1cb4:f79f  prefixlen 64  scopeid 0x20
        ether 6a:b4:b4:34:8c:2d  txqueuelen 1000  (Ethernet)
        RX packets 121  bytes 31254 (30.5 KiB)
        RX errors 0  dropped 0  overruns 0  frame 0
        TX packets 73  bytes 12835 (12.5 KiB)
        TX errors 0  dropped 0 overruns 0  carrier 0  collisions 0

wlan0: flags=4163<UP,BROADCAST,RUNNING,MULTICAST>  mtu 1500
        inet 192.168.200.221  netmask 255.255.255.0  broadcast 192.168.200.255
        inet6 fe80::d398:59e8:27be:5fd4  prefixlen 64  scopeid 0x20
        ether b8:27:eb:64:d1:40  txqueuelen 1000  (Ethernet)
        RX packets 107  bytes 40086 (39.1 KiB)
        RX errors 0  dropped 0  overruns 0  frame 0
        TX packets 43  bytes 6761 (6.6 KiB)
        TX errors 0  dropped 0 overruns 0  carrier 0  collisions 0
Setting a hostname, adjusting the local and timezone, and since the devices runs mostly headless, the GPU memory can be reduced to 16MB, which is the minimum.
sudo raspi-config
- Network Options / N1 Hostname …
- Localization Options / Change Locale: us.UTF and Change Timezone: US/Pacific
- Advanced Options / Memory Split
Adding a user
sudo su
adduser wolf
usermod -aG sudo wolf
mkdir /home/wolf/.ssh
cat >> /home/wolf/.ssh/authorized_keys …
cp /root/.ssh/authorized_keys /home/wolf/.ssh/
chown -R wolf:wolf /home/wolf
//using visudo .. add this at the bottom:L
wolf ALL=(ALL) NOPASSWD: ALL
Updating the OS
apt-get upgrade
apt-get upgrade
The rasbian OS comes with Python (3.9 or later) already installed and also the rpm.gpio library to access the general purpose input and output pins is already installed.
Deploying the app
sudo mkdir /opt/blink
Create a python script /opt/blink/blinky.py
import RPi.GPIO as GPIO
import time
GPIO.setmode(GPIO.BCM)
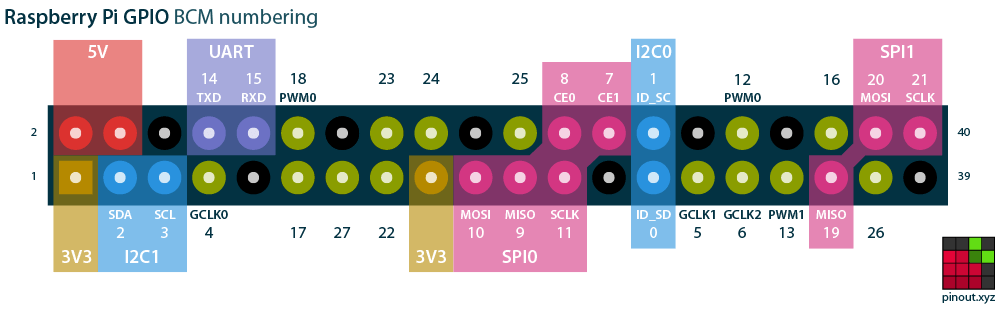
led = 27
GPIO.setup(led, GPIO.OUT)
while True:
GPIO.output(led, True)
time.sleep(1)
GPIO.output(led, False)
time.sleep(1)
and a launch script /opt/blink/blinky.sh (don’t forget to make it executable.)
#!/bin/sh
python /opt/blink/blinky.py &
Launching the app on boot
Add something like this to /etc/rc.local
/opt/blink/blinky.sh